IBob
-
Posts
3,117 -
Joined
-
Last visited
-
Days Won
27
Content Type
Profiles
Forums
Gallery
Downloads
Blogs
Events
Store
Aircraft
Resources
Tutorials
Articles
Classifieds
Movies
Books
Community Map
Quizzes
Videos Directory
Everything posted by IBob
-
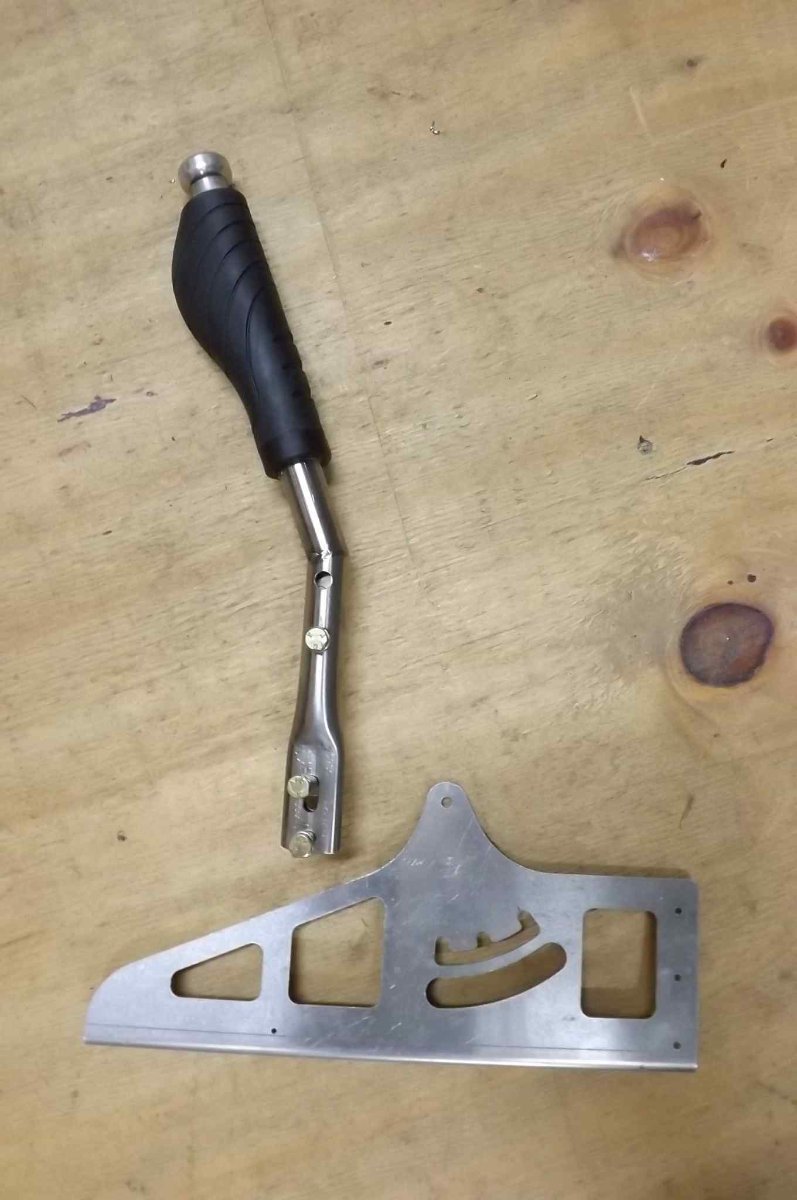
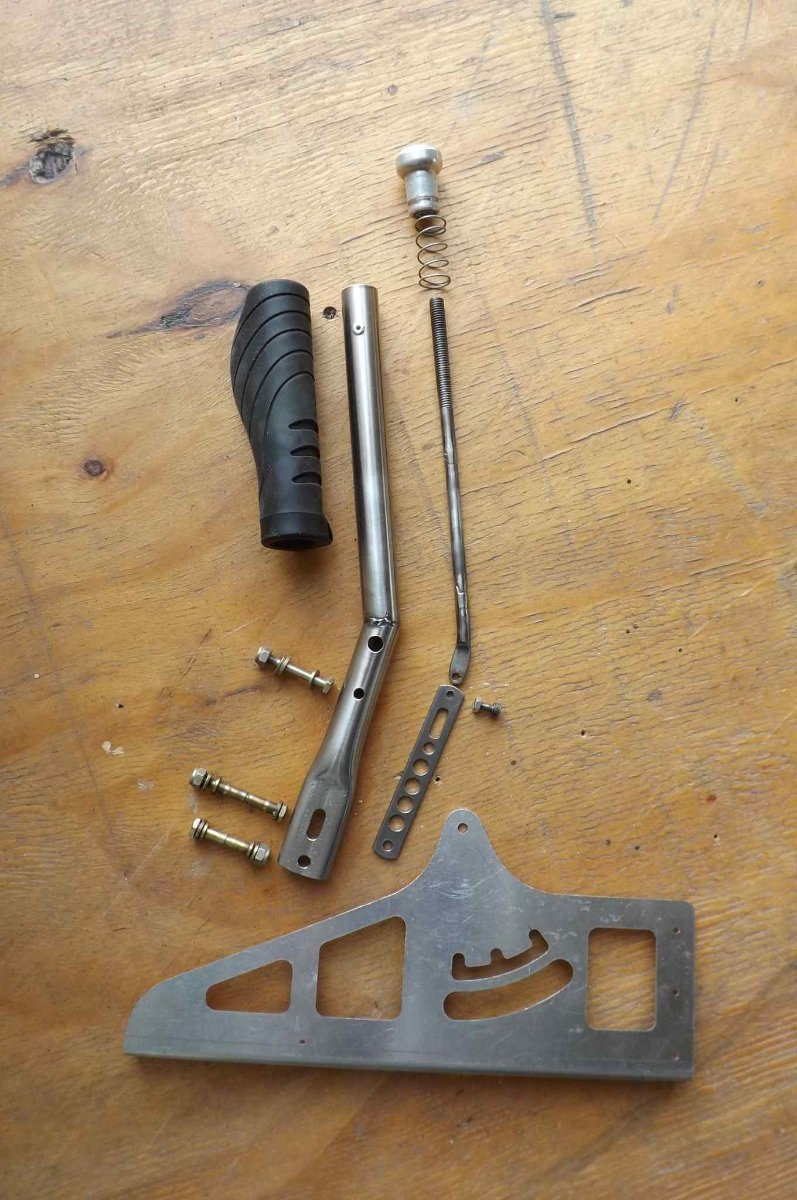
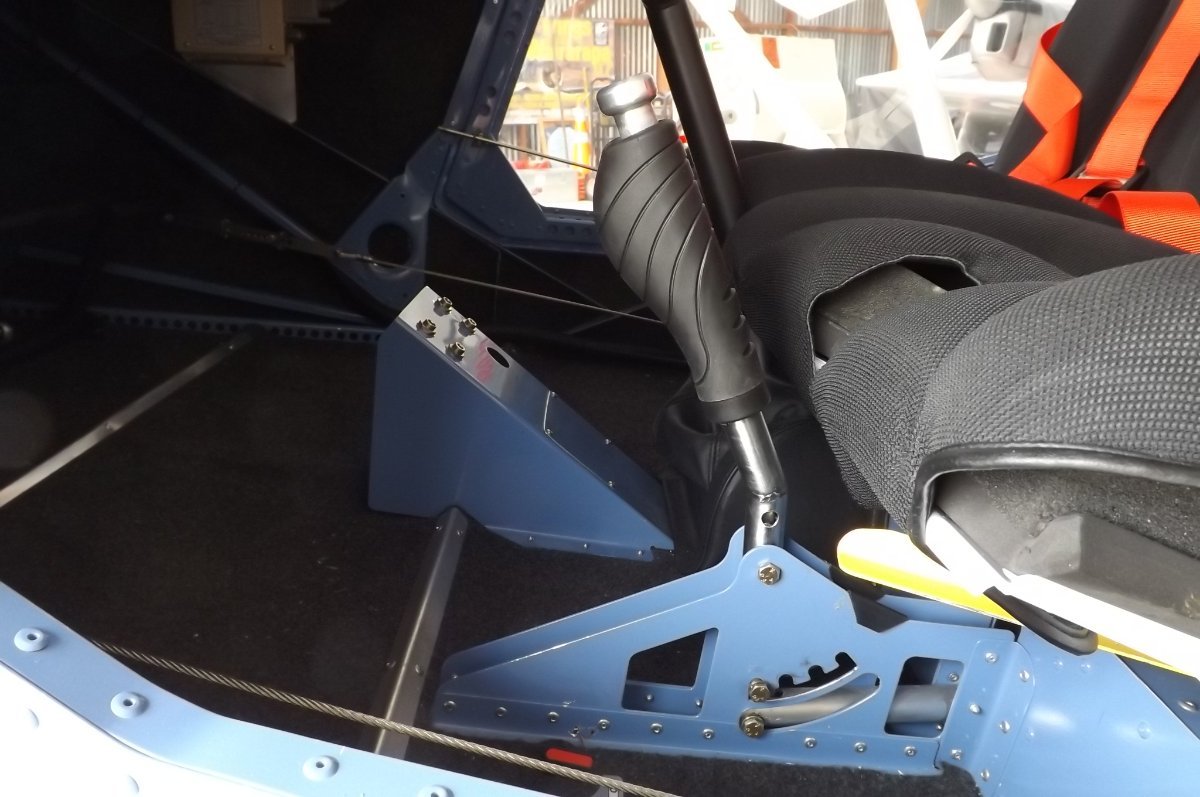
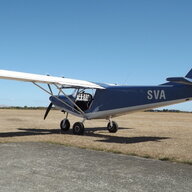
Hi Mark, and thank you for your detailed input. This is all really good info. Yes, my battery is in the forward position, as now detailed in the S build manual etc, and yes I have difficulty keeping the nose off on landing (and as mentioned above, the original test pilot commented on this). SVA will sit on her tail, just, but I have never been sure about that as a measure, since fuel moves to the back of the tanks when the tail is pushed down: can you recall what the fuel situation was when you did this? At present I am considering two temporary options: extra weight to the rear of the (extended) baggage compartment, in the form of a flat sand bag. And/or a lead strip attached at the tail skid. Hank, I have the conventional lead/acid battery: the Savannah has no shortage of lift and I have no reason to be further reducing weight. Dan, I have the Condors all round and they are quite heavy, I also have the adjustable seats, so am not sitting hard back as in the original design. And so it all adds up, I think. Also, I initially had trouble with the full flaps lever position, as you mention: the angle was all wrong, and setting and releasing it was clumsy and difficult. In the upshot, I designed an angled lever that works very well. It is simple, but needs to be fabricated quite precisely. I was fortunate to have a very capable fitter do the required cutting and welding of the outer tube.

-
Yep, I'm looking at something very much along those lines, Perry. Have also tweaked my trim for a bit more nose up, but need to fly to check that first.
-
Thanks again, Andy. It would help if this were not subjective.....but I'm not suggesting anyone goes out there with a spring balance at this stage! FWIW I have the adjustable seats, am average size and fly with them on the 2nd notch back (full back is 4 notches). My tyres are Condor 6 x 6 and the build is as per the manual, with the battery forward. I fitted Stolspeed VGs to the underside of my elevator (so they emerge at start of elevator up, though JG now recommends fitting them on the TE of the stabiliser). I did this early in the piece as SVH noted his Sav VG was much easier to get onto the back wheels pre-takeoff. However, it was too soon in my own flying to be able to reliably judge the effect. My (hugely experienced) test pilot on completion of build ran SVA through a very comprehensive documented test program, with no changes required apart from a minor tweak to prop pitch. He did, however, note that the aircraft tends to drop promptly onto the front wheel on landing. I have 200+hrs on her now, with a large number of circuits and full flap landings, so the aircraft certainly works as is. However, I frequently fly alone, with no baggage and partially full inner tanks, and this puts the C of G well within limits, but somewhat forward. I am considering both the trim, and shifting the C of G back some, to see how that affects the approach handling. All thoughts and comments welcome. Thanks.
-
Mike, the Savannah has a 6litre receiver tank behind the passenger seat, with a low level switch in the top of it and an indicator on the panel: gives about 20minutes of warning, remedies all sorts of things like momentary unporting, allows flying of outboard tanks to exhaustion without loss of power etc. I'm sure many other aircraft have something similar, it's a terrific feature which avoids all manner of problems.
-
Hi Dan, thanks for your input. To clarify: First, I am not concerned about the approach attitude; what I am interested in is the amount of stick back pressure (for a full flaps approach at 40kts). Second, and to clear up any confusion over the trim indication: the trim bargraph has 10 segments. With 0 segments showing, the trim is full nose down, with 10 segments showing the trim is full nose up. So when I am cruising with 3 segments showing, I am 3 segments off full nose down, and for a full flaps approach I have 10 segments showing, which is full nose up. I am interested in the amount of (approach) stick pressure, to see if different owners report different degrees of this: I had thought most builds would be similar in this respect, but I am now getting the impression there is some real variation. If you never use full flaps, the effect would be far less for you, and with the battery in the tail as you describe, I would guess that you can fly a 40kt approach with most if not all nose down tendency trimmed out. I have learnt to fly approaches, mostly at full flaps with 40kt approaches as per the POH, but this requires more than a little rear stick, so the controls are relatively unbalanced. It seems to me that more balanced controls would allow for more 'feel', and am interested in the views and experience of others on this. Andy, I have the Mark Kyle flap handle bracket, which gives me 3 flap settings instead of the standard 2 settings.
-
Thanks Andy, all good input.
-
Hi Perry, I certainly take your point that we need to be able to neutral trim for cruise. I'm a bit surprised that you are almost full down when 2 up, if that's the case then it sounds as though you are to the limit of practical adjustment. That would be at approx 5000RPM? Maybe your seats are set further back than mine? I haven't been out so much for the first half of the year, but hoping to get back into it: will sharpen myself up on a couple of easy strips, then drop on you before too long, I hope. How is your strip in the rainy part of the year? Bob
-
With the (antibalance) trim tab position adjusted as per the manual (top of Page11/12 of appendix Chapter 1, Rev00 12Jan 2010): The aircraft at full flaps with the trim set full up (10/10 on the bargraph) flies approach with a pronounced nose down trim. The aircraft trimmed at cruise has approx 3/10 on the bargraph. I saw a reference somewhere about altering the tab adjustment to give greater nose up trim. Two questions: 1. Are there any aviation or engineering reasons not to do this? 2. How do other XL or S owners have theirs set? (I've left the VG out at this point as it has a smaller (non-antibalance) trim tab setup). Thanks.
-
But, hey....thread drift.......( Hangin' out for more Backcountry 182 stuff here.
-
You think I'm kidding? The More Is Better Kenwood 9000......pity the poor audiophile trying to work this thing with just one pair of hands...........
-
Kenwood stereo, C1980
-
Garfly, thanks for the post. I really enjoy this guy's stuff...and it always leaves me with plenty to think about.
-
Suitable hand held radio - Your advice, please
IBob replied to old man emu's topic in Instruments, Radios and Electronics
One wonders just what it is OME is needin' to say to them up there............😬 -
Bertorelli on ditching • wet way or the highway.
IBob replied to Garfly's topic in AUS/NZ General Discussion
Probably a good idea to watch it, I found it useful and informative: It's not a video about how best to ditch, it's a video that presents stats on survival from ditching, which indicate the chances are very good. And it starts with an incident where a pilot chose a bridge landing, with resultant fatalities, when there were adjacent beaches and water, both inland and and offshore, at either side of the bridge. In other words, it suggests not dismissing ditching as a viable option, on the basis that the survival rate is very high. -
Putting aside, for the moment, questions of quality and quality assurance. And as one who has done a bit of reverse engineering in my time: A major problem with reverse engineering (copying someone else's design) is that however accurately you copy, you do not get the thinking behind the design and refinement of the original. Or as an engineer I did a lot of work for liked to say: you only get what you can see. So it can be hard to judge what are the critical parts of the design. Which is how we end up with stuff like this:
-
I hadn't been following this thread, so only just came across this, and it really made me sit up: the reason being that I had a very near miss on takeoff last year with an aircraft making an overhead rejoin. The swiss cheese evolved as follows: We had both made radio calls, but were (evidently) not specifically looking out for each other. I was on takeoff, solo, and climbing steadily, was 700' AGL at the threshold. He crossed approx 200M beyond the threshold at approx 900', at which point I was between 770' and 879', closer to the latter as it appeared to me. It spoiled my day, and I'm sure it spoiled his. We were both very fortunate that is all it did. CAA here have since published a tutorial on overhead rejoins, designed evidently to educate, but containing no new information. It has the joining aircraft crossing the strip over the threshold at 1000' AGL. Had the other pilot done that in our event, we would have been fine BUT Note he was only a bit offset from the threshold...can easily happen Note, he was only a bit low...can easily happen. Note, I wasn't looking for him, or he for me: poor airmanship...but can happen. And there is your swiss cheese. Since that event, I am more attentive to radio calls from joining traffic, also careful to climb with good forward vision after takeoff, while looking out very carefully. And when rejoining myself, I do not aim to cross at the threshold: I aim to cross approx 1/3 back from there, as in the above diagram. I should very much like to see this last item introduced here NZ. But that seems very unlikely under the current administration, who have simply doubled down on a very old tradition.
-
Thinks: I could overtake one of those........)
-
Are you saying we're backward??????????????
-
E-Props ...who has first hand experience with these
IBob replied to eightyknots's topic in Engines and Props
I don't have the prop...or the manufacturer's spec. Presumably this is further in from the tip than the traditional 1/3 radius in? -
E-Props ...who has first hand experience with these
IBob replied to eightyknots's topic in Engines and Props
How far in from the tip are you gauging the pitch? In my view, if setting pitch with a laser, you also need to be checking the (static) blade tracking, since any difference in blade tracking will (also) shift the laser dot on the floor. -
E-Props ...who has first hand experience with these
IBob replied to eightyknots's topic in Engines and Props
Blueadventures, did you also check blade tracking? -
Does your neighbour own the airspace over his land?
IBob replied to JG3's topic in AUS/NZ General Discussion
Maybe take up skeet shooting???? -
Hi Dan, a minor disambiguation of model types, which may help with your enquiries. And put me straight by all means if I have this wrong: My understanding is that the Savannah models, chronologically, are: VG = the original, but with VGs, not slats. XL = ICP reworked the VG fuselage shape at the front, from the seatback forward. The cockpit is wider and roomier, the windscreen has more rake etc. S = ICP completed the fuselage rework by rounding the rear of the fuselage, from seatbacks back. I would have said your aircraft was an XL. However, in searching for a pattern for a cockpit cover you may (also) want to enquire about the S, as your cockpit area is identical to the S, apart from some very minor rounding of the fuselage above the seatback.
-
Great stuff, Marty. Is the cowl going inside or outside of the metalwork?