IBob
-
Posts
3,148 -
Joined
-
Last visited
-
Days Won
27
Content Type
Profiles
Forums
Gallery
Downloads
Blogs
Events
Store
Aircraft
Resources
Tutorials
Articles
Classifieds
Movies
Books
Community Map
Quizzes
Videos Directory
Everything posted by IBob
-
Oh darn RFGuy...major brain fade here...but nice catch! Yep, that is indeed the oil cooler, and it's the coolant radiator Marty is wanting. Sorry about that, folks .........(
-
Just back from the hangar. The Savannah radiator has 10 cores and the core area (not including the end tanks) is 250 X 75.
-
Savannah S Vx 48-57kts for 450Kg-600Kg Vy 54-64kts for ditto. Cruise 85kts @ 5000RPM
-
Skippy, some steel gauge sets seem to come with a selection of brass ones as well. So maybe they're hiding in plain sight? If all else fails there is a selection on aliexpress: I don't know how it runs there but I recently got a set of (non aircaft) bearings and they arrived in under 2 weeks.
-
Thank you RodgerC, that is unexpected and good to know. I have seen too wide a gap cause poor starting on an older 912. And as you say, non ferrous feeler gauges are a must: the steel ones stick to the magnets and feel like a snug fit when they are not at all. I also found that my 912ULS idle speed adjustment and idle mixture screw settings were a bit out and not identical from the factory. There was no obvious impact on idle, and the settings are easily found under Basic Throttle Adjustment in the Line Maintenance Manual.
-
Oil cooler placement and ducting advice - Rotax 912ULS, CH701
IBob replied to Marty_d's topic in Engines and Props
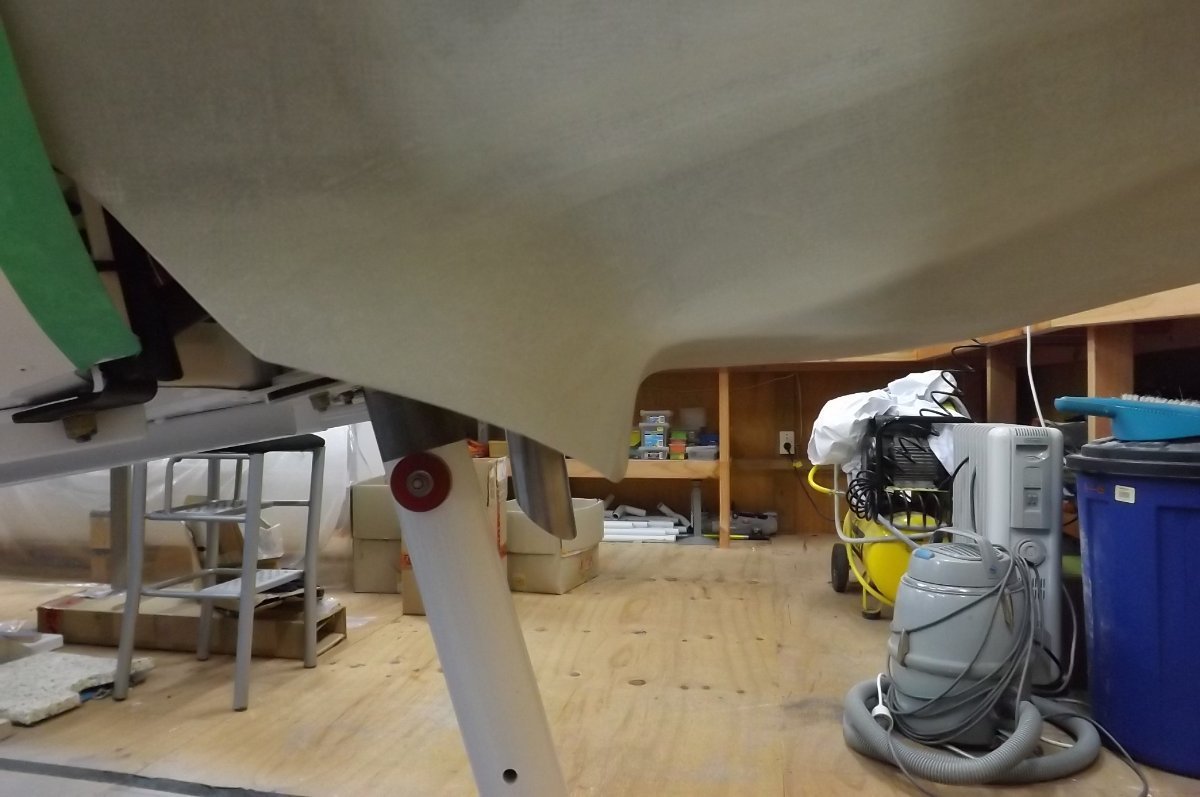
Trike, there is a factory VG on our field, I cannot remember the cooler/radiator layout, but he has no problems, has to blank off part of the oil cooler in winter to get the temps up. Yes, best you provide pics or a sketch, otherwise it is very difficult to comment. -
Oil cooler placement and ducting advice - Rotax 912ULS, CH701
IBob replied to Marty_d's topic in Engines and Props
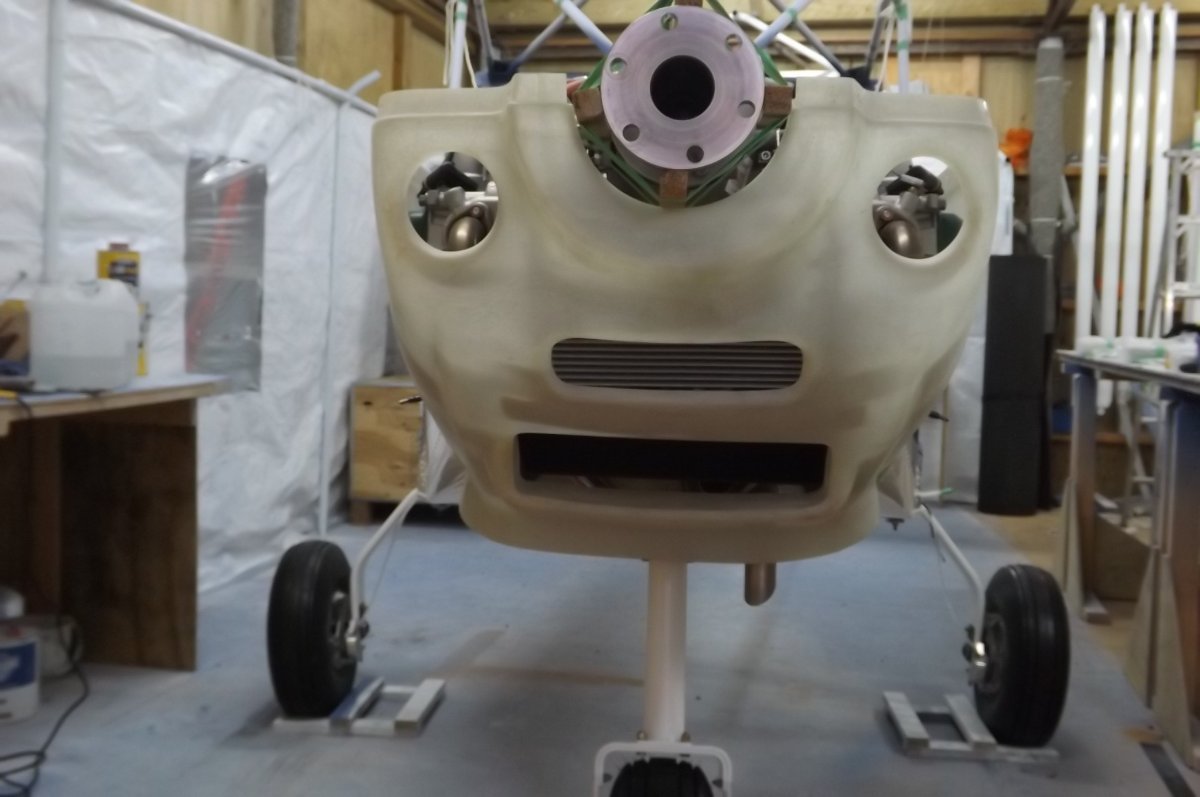
No ducting. But the radiators do sit close to the air scoops, though this pic is a bit deceptive, makes them look closer than they actually are (I have an LED light bar landing light bolted inside the lower lip of that upper scoop and it's well inside the scoop without being close to the oil cooler).
-
Oil cooler placement and ducting advice - Rotax 912ULS, CH701
IBob replied to Marty_d's topic in Engines and Props
That's the 80HP 912UL. -
Oil cooler placement and ducting advice - Rotax 912ULS, CH701
IBob replied to Marty_d's topic in Engines and Props
A pic would help to visualise what you've got, Trike. -
Oil cooler placement and ducting advice - Rotax 912ULS, CH701
IBob replied to Marty_d's topic in Engines and Props
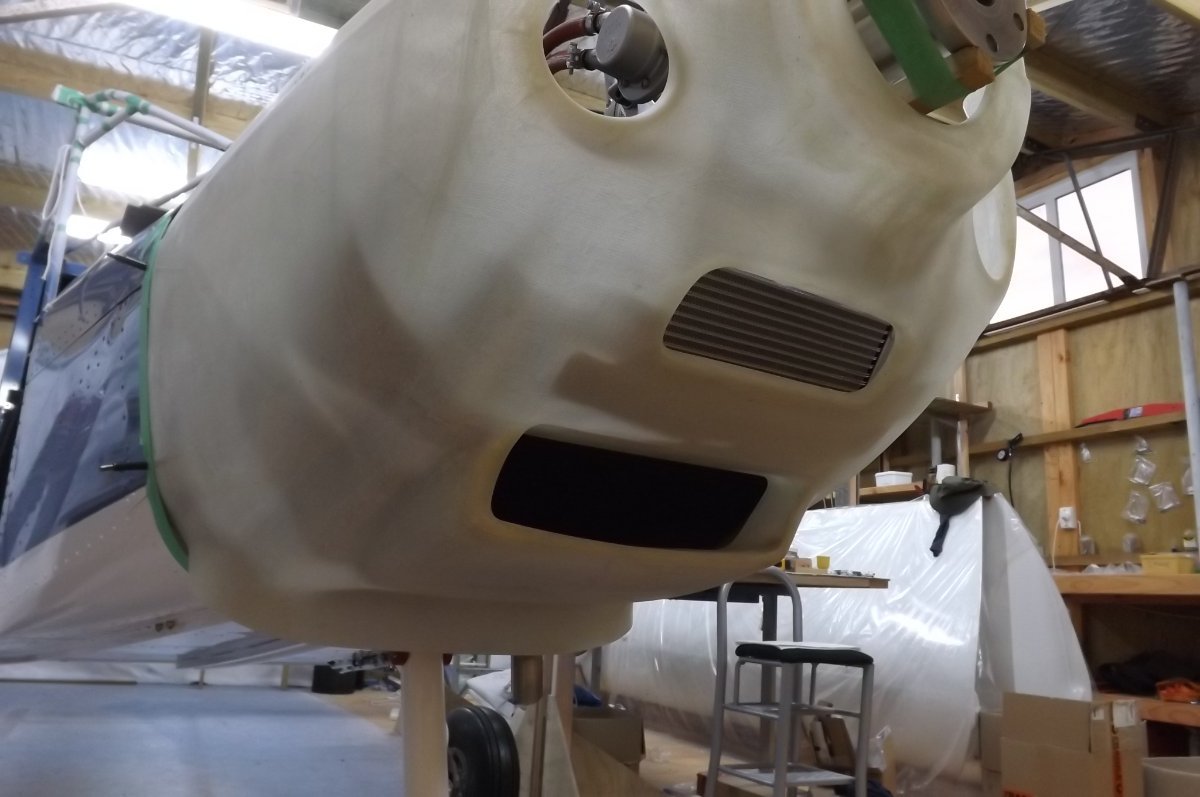
Hi Marty, here is the arrangement on the Savannah, with the oil cooler upper and the radiator lower. All temps remain well within specs here in NZ, in fact I have about 1/3 of the oil cooler blanked off. Rotax used to reccomend raising the oil temp each flight to 90'C, I believe they recently raised that to 100'C, I don't see that unless I make a sustained hard climb. I would say you have plenty of air intake on your cowl as it is. I would go with that, and in the unlikely event that you need more, you could consider fitting a scoop at the air exit point underneath to lower the air pressure there and induce greater flow.
-
Looks okay to me, apart from the possible drawbacks already mentioned. About the only comment I would add is that they must be in series, not in parallel: I had a site with twin industrial boilers in parallel, in a closed circuit feeding a plate heat exchange. While the pipe work was almost exactly mirrored between the two boilers and each boiler had it's own circulating pump, if there was any restriction in the system then the flow would go through one boiler or the other. And once the flow began to favour one boiler, it tipped increasingly that way. So the stable states were flow through one boiler or the other, and the unstable state was equal flow through both.
-
Do you have a pic as to how/where they are mounting them, Skippy?
-
That's not what is happening, Nev: One part has the full sized hole in it, the other part has just a pilot hole (which is not exactly centered, it would be better if there were no pilot hole). So it's a matter of marking up then holding the drill centered to drill on that mark (rather than on the pilot hole). The bush (which not drilled out of true) is then inserted through those two parts, and secured with the ubiquitous AN3 bolt etc. Given the shape of the elevator, which narrows to a box section at the centre LE, it would be surprising if the (pilot) holes were perfectly aligned. Also this: that centre section (and bearing) takes all the load of the elevator control cables pulling forward. So, even if the holes were perfectly aligned initially, they wouldn't stay that way (without the bearing) once the cables were tensioned.
-
PS and to state the obvious: the hole you drill must take in the existing (offset) pilot hole.
-
Yes. As I recall, with the tip pivots in, I used a fine marker to mark through the 0.235 hole onto the stab flange. I then disassembled and clamped a piece of thick scrap (steel?) with a 0.235 hole in it, over my marking on the stab flange. This held the drill centered so I could drill the stab flange. I also took a bit off the tip of the stab flange so that it cleared the elevator skin at that point.
-
I think that's excellent advice any time you get stuck in a build.
-
My money is on the paint they apply to all the fabricated steel assemblies: the bush will be greased inside during final assembly, the paint needs to come off. If the bush or the bolt are wrong, ICP need to be told.
-
Looks to be plus and minus 1.5thou for the AN3, Onetrack? http://www.zenithair.com/kit-data/ra/an.html
-
Hi again Bryan. That 0.005 surprises me a bit: I would have thought the stud was a standard AN3 bolt, welded to the backing plate, unless they have changed how they are doing it. Have you been able to clean the paint back from that part?
-
PS There's a layer of black paint on the pin too: some careful smoothing of that with fine emery may be required if the bush is still tight.
-
Hi Bryan, 1. The bushes sometimes have a slightly raised inner lip at one end, where they were parted off during manufacture. This needs taking off, I used a small deburring tool. 2. The pin is AN3, and should take an AN3 nut (all the bolts in the kit are AN, except perhaps the little ones in the trim linkage, and the big SS ones that hold the main undercarriage). I would look at the pin very closely to check there is no damage or weld spatter (since the pin is welded to a backing plate.) I would then try more than one nut, in case you have a damaged nut. If no nut/s would start, I would then clean up the tip of the pin, where the thread starts, with a fine file: once the nut is on, the thread at the tip does nothing.
-
Nice crackle finish(?) on that panel too, Mark.
-
Interesting (if unsettling) sequence of events, Kevin. I'm certainly no engine expert either, but can I ask the following questions: 1. Do you have hydraulic lifters? 2. Did you turn over the engine at all between emptying and refilling oil? 3. You mention a dropped valve seat, also minor contact with piston. Is it possible that the contact bent the valve, which then dislodged the seat? (Hard to tell from the pic.) Also I fished up this, which I expect you have already seen, but if not you may find informative:
-
I made my own simple wing LE root fairings, as I didn't like the way the standard fairing (which just extends the LE shape inboard until it meets the windscreen) intrudes on the pilot's vision. They are just a flat aluminium shape, curved round, nothing 3D. I am a reasonable DIY pattern maker, but it was a surprisingly long job getting a pattern for the shape. Sorry, I can't comment on performance as this was done before she flew. In the case of the Sav, I doubt there would have been any difference.
-
Just don't go to the BMW shop and say 'Show us yer nuts'..........