IBob
-
Posts
3,148 -
Joined
-
Last visited
-
Days Won
27
Content Type
Profiles
Forums
Gallery
Downloads
Blogs
Events
Store
Aircraft
Resources
Tutorials
Articles
Classifieds
Movies
Books
Community Map
Quizzes
Videos Directory
Everything posted by IBob
-
Works fine for me.
-
Continuing to follow (and enjoy) your Sonex voyage of discoveries here, Skippy. It continues to raise interesting stuff I'd never thought about. I know where there's as Sonex parked at the back of a hangar...it almost makes me want to look at tinkering...........)
-
What Nev says feels right: stiffen it up and you increase the loads elsewhere. My first thought was to try and limit movement with smooth running, including starts and stops, hence the the question about prop weight which seems to make a big difference in that respect.
-
FWIW: My idle jet and idle throttle stop settings are as per the Rotax manual. (I checked them at new and one of them was a bit out from the factory, can't remember which one but it's a very quick setup, and evidently worth doing). With those settings, the tacho drops towards 1400 when pulled to the stop, and I switch off the ignitions almost simultaneously as it is getting there.
-
Skippy, what weight of prop do you have? And what are your engine starts and stops like? I ask because I have a reasonably light Bolly 70" prop, and that coupled with the improved Rotax ignition retard, plus a bit of practise and understanding gives me very smoothe starts and stops. Our club Tecnams, however, have the much heavier prop mandated by the manufacturer and engine start/stops can be quite ugly, no doubt resulting in considerable engine movement.
-
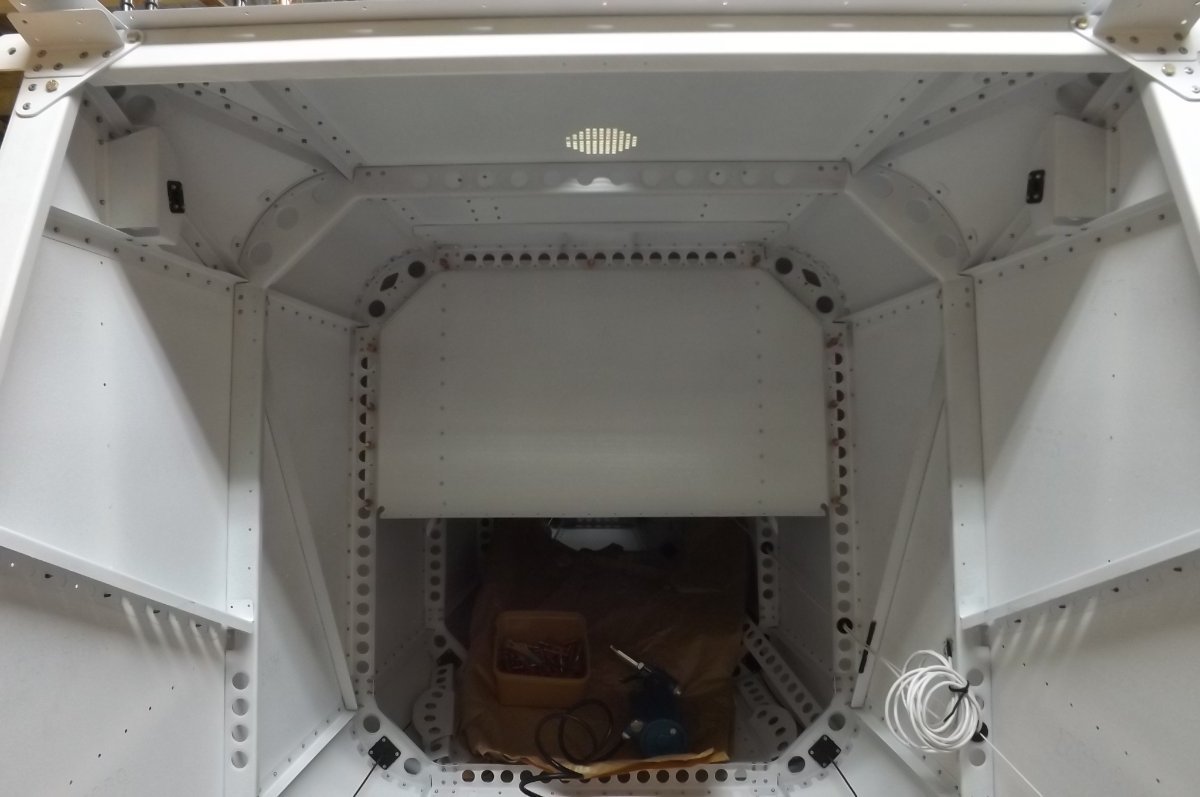
FWIW kbstone, my kit came with the skin holes and blowout panels for a parachute setup. Since I have no parachute, rather than mess around with those panels (which go under the skin), I just blanked the holes off with a simple capping panel. This I made with an offcut from the kit, specifically the cut out piece in the lower wing skins where the tanks go in. If someone wants to fit a parachute in future, that is simple enough. In the meantime it is a tidy and weatherproof solution in a place nobody ever looks anyway.
-
I don't know kbstone. What the kits have now is a round pattern of drilled holes in the top skin, that fit under the cover you have there. I would add a skin over that big hole, with a circular pattern of round holes, then mount your cover over that. We put the cover on late, as we like to apply silicone between skin and cover, also a lip of silicone round the holes to keep out rain both in the air and on the ground.

-
Pat, what I meant by 'the arrangement' is the individual air filters on the carbs, taking air always from under the cowl, which should be warmer than outside air. And my suggestion about sustained low power settings (usually on long descents) was because the engine will be producing much less heat in that mode of flight, so the air under the cowl and entering the carbs will be cooler. I cannot say if your engine compartment is warm enough to avoid ice. That depends very much on how the air circulates there. I suggest your best source of information would be from pilots operating similar aircraft in your climate.
-
Yep, that's the arrangement on at least one of our club Tecnams, and I'm not aware that they have icing problems, apart from one possible incident some years ago. How effective it is will depend on what sort of temperatures you get at the air intakes under the cowl. Probably best to avoid long descents at low power settings?
-
Yes, absolutely, carb ice can be a problem. Some Rotax equipped aircraft do not have carb heat, but instead take air from under the cowls all the time. A VG on our airfield does have carb heat, and the XL and S Savannahs all do too. It's probably easiest to post a pic of what you have under the cowl, Pat?
-
Strictly speaking, that aint a float bowl vent....it's not for venting, it's for pressure balancing in the float bowl....but I'm sure we've had this conversation already........)
-
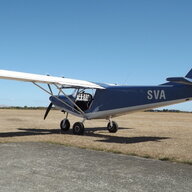
Skippy, I can see the problem right there: someone has made off with your front wheel.......(
-
I have the later model ULS with the CH coolant temp readouts for cylinders 2 and 3. 2 always reads cooler than 3. But given that 2 is front LH, with the sensor at the front of the head, while 3 is rear RH, with the sensor at the rear of the head, that has never surprised me, and since they are both well below max temp, it has never bothered me.
-
True. It was instructive flying without the gauges, not that we were up for long. And I spent the rest of the afternoon purging the static pipework, disconnected, with a hot air gun.
-
No......(
-
Either side of the rear fuselage, Nev. And I only once washed her with a hose.......and after that I modified the static pipework to add a high spot before running it forward.
-
My kit supplied pitot is simple aluminium tube, not sure of size, maybe 4mm ID. Cut off square, but with the inner edge of the cut bevelled, so the tip is a sort of little funnel.
-
RFguy can you suggest where to source headphone jacks? Are we best to go to aviation outlets, or is the quality similar regardless? Thanks.
-
Does the M760 have VOX mode? Is that not intercom? I'm no expert on this but others here will know. Maybe consider putting the jacks in baggage front centre roof as per the South Africans: they are practical outfit, much of what they do makes sense.
-
Hi Marty, depends on the radio. Mine is XCom, which has the intercom built into it, so no additional gear required. I would think most radios now have that for a simple 2 person setup. As for position of the jacks, I had them on the floor console forward of the stick, but didn't like that, so have now shifted them to a small box at the backrest between the 2 seats. I prefer this as I can see them in case I need to check plug seating in flight, and the cables are inboard of both pilot and pax, so we're not dodging round them when getting in and out. The only complication we then had was getting the headsets crossed up with someone else as PIC, the problem then is that you don't realise you are not transmitting (since you are pressing the wrong PTT button). it.that. I saw recently where the South Africans are putting their jacks at centre front of the baggage area, which is another possibility. A lot of Savannahs have them mounted at the front outer corners of the baggage shelf, but I'm told that can be very difficult to reach or see if you need to check plug seating in flight.
-
Yes, good luck with your search, Oskar! I had not meant to discourage you, only to say look carefully before you buy. The Savannah is a very good aircraft of it's type, versatile and fun to fly. There are now thousands in use around the world, including a large number in Australia, and a smaller but growing number here in New Zealand. May one of them find it's way to you!
-
It can be, Oskar. Savannah supply a primer paint that is used at all lap and metal joints. If applied with reasonable care on both surfaces, this should protect against occasional moisture. But any paint system has it's limits, and if moisture and contamination are constantly present...as they can be at lap joints in constantly wet situations...then corrosion may result. It may be worth getting maintenance people to show you what corrosion on aluminium looks like: typically, once it reaches the metal, it then runs under the good paint, gradually spreading.
-
Other considerations: Some of the earlier Rotax 912s were prone to crankcase fretting. The later 912s have a good functional ignition retard for starting. The older ones do not, which can result in poor starting and eventual sprag clutch damage.* While the 912 has proven itself as a very robust engine if installed and run as per the manufacturers instructions, parts and and repairs can be very expensive: so much so that relatively few are rebuilt. * Key to avoiding this is starting technique together with a good battery and wiring arrangement that turns the engine over rapidly for starting. The standard Savannah arrangement (and various other aircraft) use the aircraft hull for the 0V battery return. However, most builders here install a good sized 0V cable from battery to engine to ensure good starting power. Some of the older Savannahs also had the battery mounted near the tail, in which case it is doubly important to ensure optimal battery cables of a suitable size.
-
Oskar, to answer your question regarding the engine: whether you would be required to do a total overhaul depends on local legislation, so ask your local microlight club, they will know the answer to that one. Apart from that, I think the reason you are not getting a lot of response here is that it is impossible to know the quality and value of an aircraft from a distance. So it may be a hangar queen, beautifully built and maintained, or it may be an absolute dog, poorly built and maintained. And the only way to tell the difference is to have someone knowledgeable look at it: ideally someone familiar with riveted aluminium skinned aircraft of this sort. This is absolutely not like buying car: aircraft are very lightly built, and microlights especially so. The aluminium skin has lap joints, which are potential areas of corrosion as they can trap moisture and contamination. And you will certainly not be able to 'see' such corrosion without close and careful inspection. Also be aware that the Savannah comes in kit or factory built form, and kit builds may vary greatly in quality, depending on the abilities of the builder. So, what do I think? I think it could be a nice aircraft if it is well built and is in good condition. Though I would be very wary about the floats, and as Nev said if it has been anywhere near salt water I would not consider it: the water will have got into the skin laps, and there will be corrosion there that cannot be fixed. And this may be a problem even on fresh water. I think it could also be a poorly built or maintained aircraft, in which case the cost of bringing it back to good condition could be many times what it is worth. As Nev said: get a good independent check. Always.
-
But certainly reminiscent of them good ol' days when, to add to the excitement, the pilot wasn't allowed to see where he was actually going. Or where he'd been: just where he might have been if he was travelling parallel to his actual current path.............(