Lyndon
-
Posts
688 -
Joined
-
Last visited
-
Days Won
1
Content Type
Profiles
Forums
Gallery
Downloads
Blogs
Events
Store
Aircraft
Resources
Tutorials
Articles
Classifieds
Movies
Books
Community Map
Quizzes
Videos Directory
Everything posted by Lyndon
-
Small world. He is actually my doctor. Been seeing him for 5 years. Never knew he flew plane Lyndon
-
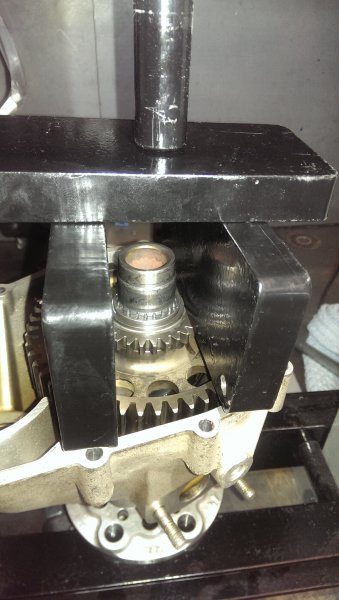
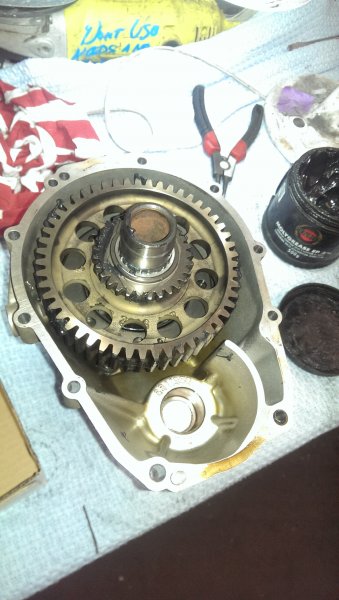
I have done my gearbox. All was good. A bit of fiddling with the three diaphragms to line them up. seems odd the middle one can't be centered and relies on the others to keep it in place. There is some offset wear because of this. But it clearly works as it's done 1740 hrs and is in very good Nick . Can't believe the new halves were 70 dollars. I still can't assemble my engine as I have issues with cam end play. This is taking a long time to sort but hopefully by the end of the week it can be sorted.

-
I have thought about this again. The weak point is the charging system. As there is no back up. It that fails you are forced to look for somewhere to land. Not immediately but it will change your plans. with a mechanical pump I could have it fail. The electric pump fail or the charging system fail. Obviously not all at once. If this happens the plane will happily fly to where you were going. So I will just pay the extra and get a nice new mechanical pump. Thanks for the input. Lyndon
-
My motor is a 2010 or 2011. Its five years old. I'm also not of the opinion of paying 29 bucks plus gst for an o ring that I can get of the shelf for 2.90 is just plain wrong. . Keep in mind this Austrian aircraft manufacturer uses Indian parts in its engines and charges a premium for them
-
I'm not sure as what is required. But the pump at 1740 hrs in and aircraft has done it's job. It's 2016. Mechanical pumps are a thing of the past. I can put a plate on it for a dollar. I can run a pump on the firewall with hoses away from the engine for 25 percent of the mechanical pump. In my experience it's just as reliable. I can even run a lithium auxiliary battery set up with this pump for half the cost of the mechanical pump. I just don't like be fucked over. Its a 12 dollar pump.
-
Maybe I will run the USA made pump directly off the battery terminals. Via a circuit breaker. This will be my back up. At a guess it will have to run 100 hrs in 2000 hrs hrs of the engine which I will never do. And I but a genuine new Mazda 1970 pump as my main pump. If it's fitted correctly and clean fuel it will never fail. Lyndon
-
I haven't got to the plumbing stage yet. If gravity fed I'm sure the bings would work fine. But if they run through an electric fuel pump. Let alone two what I'm contemplating it will not work. You need pressure to run through a dead pump. Not much but it is more that a tank in a high wing
-
I also to be clear. Was indicating in a failure. The spare pump for take off and landing be run thru the battery. Nothing else. I'm involved in race engines that run a total loss system. As charging equals horse power. If they were a plane you would easily find a spot to land.
-
As I say I'm new to this. I was thinking you cut the fuel to a Rotax to stop it. I was of the understanding once running turning off the master does not stop it running. My apologies. I thought it had a redundant ignition system. Lyndon
-
Current diesel engines run and electric to feed the real pump which is mechanical and does all the work. But these are direct injection and run well ove 20,000 psi. Some to almost 30,000 in a performance diesel. But these are the ignition system with a boosted engine. Thus the pressure. Apart from these I think everything with a spark plug uses and electric pump as it it goes in under no pressure.
-
Before you disassemble. Scribe your splines with a 1 mm feeler. After cleaning and inspection, assembly with it all settled. Adjust your shims to the 1 mm Scribe. Perfect. Depress a bit over 1 mm install your new halves and it's done .
-
Ps always new halves
-
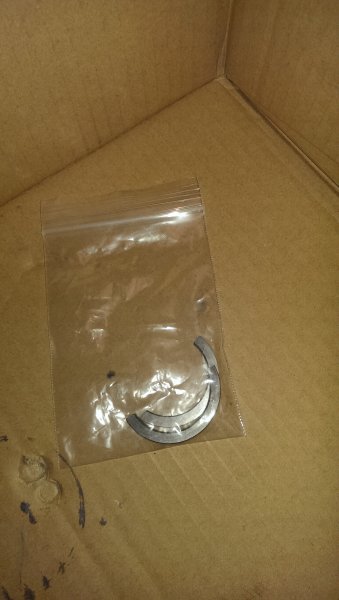
Shim as required
-
Is .039 tho or a mil unloaded. Depress then fit halves. Easy as
-
Did you find out why the pump failed ???.
-
Does the current efi engine run a mechanical pump ???. If it does then I will rethink my fuel arrangements. Because one thing I can assure is the carburetor is dead. Even in my lifetime.
-
Your mis understand. Sorry. What I'm saying the battery is not dead. You have killed one circuit with the master switch. But you can have another. Yes I do know the meaning of master. But you get my drift. Believe me your engine still runs even your master turned off
-
Guess really what I'm saying is a mechanical pump any better than an electrical one. I can answer that. No one makes a mechanical pump any more. So two separate circuits two pumps should be fine. Yep no one makes a flat tappet engine either. Unless your Rotax. . They do both because it works. Not great but it works. If they were building car engines they would be broke. I totally understand the litigious society we live in. It's a Shame really.
-
I may be wrong. But you kill every thing. What I do know is the engine still runs if it gets fuel. The battery still has a full charge. On a complete redundant circuit is another pump. Has to have 30 to 60 mins in it. Pumps don't fail and wiring looms don't burn for no reason. I'm very particular in what I do and I would be very surprised if you needed the second backup. Then the third is to land which is easy in a Savannah. But like I say I'm new to this so I really appreciate your comments. Lyndon
-
The battery is still alive after a master has been cut
-
More likely a wing to fall off than two circuits fail at the same time
-
The master does not turn off the engine. It still fires the plugs. What I'm saying is two separate fuel pumps. Easy to wire on two curcits
-
Yes I get that. Cut all electrical power and hope it stops burning. All being well the engine keeps running as it produces its own power. But on a redundant loom is your back up pump. It still pumps ???
-
Update. The main thru bolts are a torque to yield arrangement. Without checking 15 nm plus 180. I'm doing some research but in my industry torque to yield are one off use. I will get back to you. Ps I have to tool to remove the rear the engine if any one needs that. Also I'm about to do the gearbox service and preload. If anyone has thought of saving 600 bucks and doing it themselves. Lyndon