
Kyle Communications
-
Posts
6,751 -
Joined
-
Last visited
-
Days Won
107
Content Type
Profiles
Forums
Gallery
Downloads
Blogs
Events
Store
Aircraft
Resources
Tutorials
Articles
Classifieds
Movies
Books
Community Map
Quizzes
Videos Directory
Everything posted by Kyle Communications
-
The issues surrounding lithium batteries.
Kyle Communications replied to Downunder's topic in Engines and Props
45 to 50 bucks at most sites like Amazon or Temu or Aliexpress. Molex can be 50 to 600 they are outrageous https://www.amazon.com.au/GIANNEER-Impression-Crimping-18-14AWG-Terminals/dp/B0BYZJ5FDV/ref=sr_1_7?adgrpid=86956646837&dib=eyJ2IjoiMSJ9.H3OszCcePDlzoloPsiIBNWgG9XVHbzUa2lU4IRQ9D8Mb-beE-e8BoUwIxJeNHBzyP6k_O3vdVXOjJYUFHOfXyixuGUy75_v4h96sd75tq2salDD6uKMlqYrCCf-K0y-XCSRMPm6M6-GCH7Jsc02uCNlJ1VCnsnB6I1s2klpQbgMCIgDElQudK9FBoXxCXZjh1R7yF7GJTaz4JflE1eNrtOKqhxuC5msUZXU4ng_o4Evz6i0T6FQlZNPVXG_-4X6rWEaLaQ76JF9FZenDmYwSv4b1E9_aMFD0di3ff0zxt-k.pobmE3auPM4uE7rEi21XaAf2La4JBlgvChOrLMFIXv0&dib_tag=se&gad_source=1&hvadid=591203968948&hvdev=c&hvexpln=0&hvlocphy=9069009&hvnetw=g&hvocijid=2427066532002779419--&hvqmt=e&hvrand=2427066532002779419&hvtargid=kwd-3675538365&hydadcr=2608_359735&keywords=deutsch+crimping+tool&mcid=c01c3e1d8939347a9dfed198fa1b1987&qid=1791356108&sr=8-7 -
The issues surrounding lithium batteries.
Kyle Communications replied to Downunder's topic in Engines and Props
The crimp tool for them is quite cheap. Certainly far cheaper than anything for a Molex connector. -
The issues surrounding lithium batteries.
Kyle Communications replied to Downunder's topic in Engines and Props
I use all Deutsch connectors for all connections where possible in my aircraft. Proven for good connections in earthmoving equipment and high end machinery. I first came across them more than 2 decades ago when I started doing all of Hastings Deering (Catepillar) work for radio and electronic equipment. The standard was Deutsch. I have been using them ever since. You cant beat them -
That is what I posted before in a previous post. That would be the best way to do it the issue though is you will need to manufacture double the amount of new bushes and also be very accurate on their length as you will still need a washer between the hanger bracket and the flaperon bracket
-
I used to use a silicone grease but I actually started using white lithium grease about 5 or 6 years ago. I think its better Mark
-
I have the nut on the bush side on all mine but the the head of the bolt is on the inner flaperon L bracket but on the outer portion the head is on the hanger bracket. I will confirm the operation tomnorrow when I get to the hangar
-
The white grease is Lithium grease. I used to use a silicone grease years ago but now I have swapped to the Lithium. Yes it seems now that is exactly opposite to the original way. So who knows which way is correct. So long as the bush doesnt tun inside the alu would make the most sense. The whole idea for a bush is to have the bolt rotate inside the bush and not the bush rotate on a surface that is loaded. The ideal would be to have a fixed bush pressed into the wing hanger bracket and another bush fixed into the flaperon bracket. A washer separator like they have where the 2 smaller parts of the bush meet. This would make more sense to me I hope the Ventura manual is better than any of the Savannah manuals ' Mark
-
Yes in that thread the drawing Ibob did is how I have always done mine . On my original build and this rebuild as well. John Gilpin got larger teflon bushes made but you had to ream out the hanger brackets and also the flaperon L angle mounts
-
The bolt will always need to have the bush rotate around it. Or the bush rotating around the bolt. You cant have the bush rotating through both alu parts otherwise what would be the point of having a bush you could just have a bolt through the hole The manual for the Savannah has always been terrible
-
Thats interesting...that arrangement is different in my manual the drawing show the bolt head on the head of the bush. Yet I only have the photo in my manual the english one and from around 2011 and it appears to show the nut on the bush head. Either was it doesnt matter. What ever part thee head of the bush is on that is the part the bush needs to NOT move in so really needs to be loctited if its not a press fit
-
yes the bush is fixed and it rotates around the bolt. What most have done from what I have seen is they tighten the bolt too much so what happens is it locks into the bush and the bush rotates in the aluminium...thats not good. It wears out the bush and the hangar bracket. It con only be the bush that rotates around the bolt...just like a door hinge Think of it this way. The bush is locked into the hanger bracket and must be fixed. the bolt head is always on the L shaped alu that is connected to the ailerons and it doesnt rotate so it must turn inside the bush when the aileron moves. If you look at the manual the bush head is always on the other side of the hangar bracket and the castellated nut is on the bigger flange of the bush. That nut needs to rotate on the head flange of that bush. When I go to the hangar next I will see if I can do a video to explain it and show it Mark
-
My Savannah S model rebuild Blog
Kyle Communications replied to Kyle Communications's topic in Savannah
The issue in this case is the particular aircraft was built by a couple of L2 apparantly. The build quality was not very good at all. So they back then can sign off on the aircraft. Now you need a L4 to sign off. Any L4 doing a inspection would...or should go over all the aircraft and bolts etc. Even look inside the wings with a camera etc. The inspections are AP inspections are required I believe when building a Experimental aircraft under SAAA /GA rego although again you can get a AP to do it at the end...for a price of course its usually a couple of grand for a AP to do it after a build Mark -
I have used the brass bushings. The biggest issue is making sure the bushings are installed correctly. The main thing is to make sure the bushing is actually working as a bush. Most from what I have seen especially with wear is the bushing is rotating in the alu hangar bracket. You can over tighten the setup. My latest build I have loctited the bushes into the right sections to make sure they cant rotate in the housing. You want the bolt only to have the bush rotating around it. Making them from teflon or similar still has a issue if the bush is rotating.
-
My Savannah S model rebuild Blog
Kyle Communications replied to Kyle Communications's topic in Savannah
This build started with about 12 to 18 months in mind as it was a crashed aircraft. It turned into a bigger than Ben Hur project due to the aircraft being so badly built when it was first made. Basically I made my own full kit for a Savannah. There is very little of the original aircraft in this rebuild. Only a few parts really..some wing ribs and the tailplane and fin. I made the ribs and skins for the rudder. I re used both the L and R centre side sections for the fuselage. I got all new rear fuselage frames from the factory as they were problematic to make but I cut and drilled all the skins for the wings and fuselage.. It has taken me way too long. I have been retired now about 3 years but 6 years ago I was still working full time and also we were looking after my Mother in Law and my Father for quite few years. Also built a house up at our farm during this time as a owner builder as well So other things got in the way. Then 3 years ago I started doing a subdivision here so that took up a lot of time and I also had to store the aircraft for more than 6 months to have it out of here while the subdivision was done because I had to take down 3 of my sheds here to do it then put up a new bigger single shed here. That was a 2 year exercise and a lot of my own tax already paid money to get it done. Then of course Mr Magoo then gets me on a crap load of CGT ! So now thats all over even though currently living between my big shed here while a new house is finally being built...I am not the owner builder on this one as I am over that exercise so its a normal home builder. I have a hangar to go up soon at a airpark we are going to move to and another house on that site but again I am not doing that ..other companies are so its a walk in sort of job. Finally now I do have the time to get back into finishing Mabel. After Mabel is flying then I can get back to finish building my RANS S21 Outbound which has all the wings and tailfeathers done. I was going to sell Mabel when the S21 is done but the boss here says she wants to keep Mabel so it will be one aircraft for local travels and the other for our longer trips I just hope I do live long enough to enjoy the fruits of my labour 🙂 -
The issues surrounding lithium batteries.
Kyle Communications replied to Downunder's topic in Engines and Props
Roger my guru mate has tested the Carmo a lot compared to the original and said that it is by far better to use than the genuine Rotax ones for charging Lithium batteries. It actually puts a short on the alternator windings when its up to voltage. This doesnt hurt or cause excess current or heat in the windings. Roger has used my CDI setup to do the testing on them and now has made up a unit to test all types of regs even the 3 phase ones used on the newer rotax engines. So if you are replacing your reg use the Carmo one its by far better than the original one -
The issues surrounding lithium batteries.
Kyle Communications replied to Downunder's topic in Engines and Props
The biggest problem with using Lithium batteries in a aircraft especially with a Rotax is the regulator that is supplied is NOT designed for Lithium charging. If you have a reg designed to do this then this is the first layer of protection you have. The second layer is the BMS inside the battery but there are many many cases that the BMS fails to take the grubby signal from a old style regulator. This is why they then catch fire. Its not a rare occurance either If you have a regulator that can supply the BMS in the battery with a set of paramters that can do both Lithium and lead acid then thats a good ...or better safeguard. -
My Savannah S model rebuild Blog
Kyle Communications replied to Kyle Communications's topic in Savannah
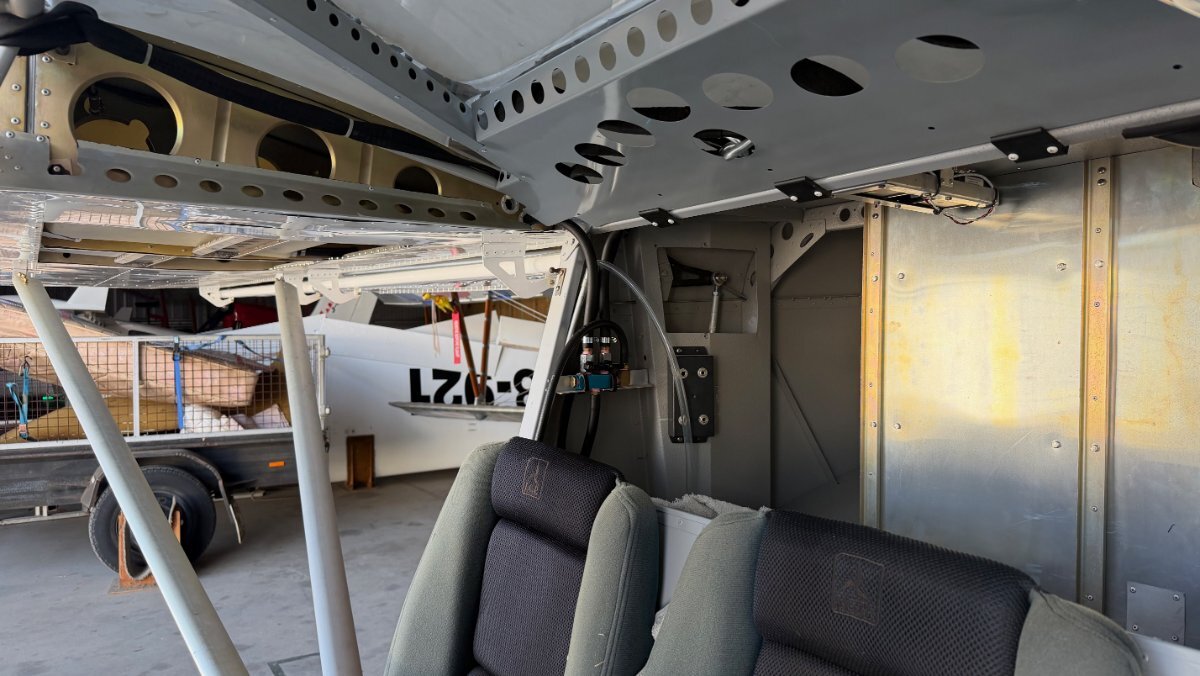
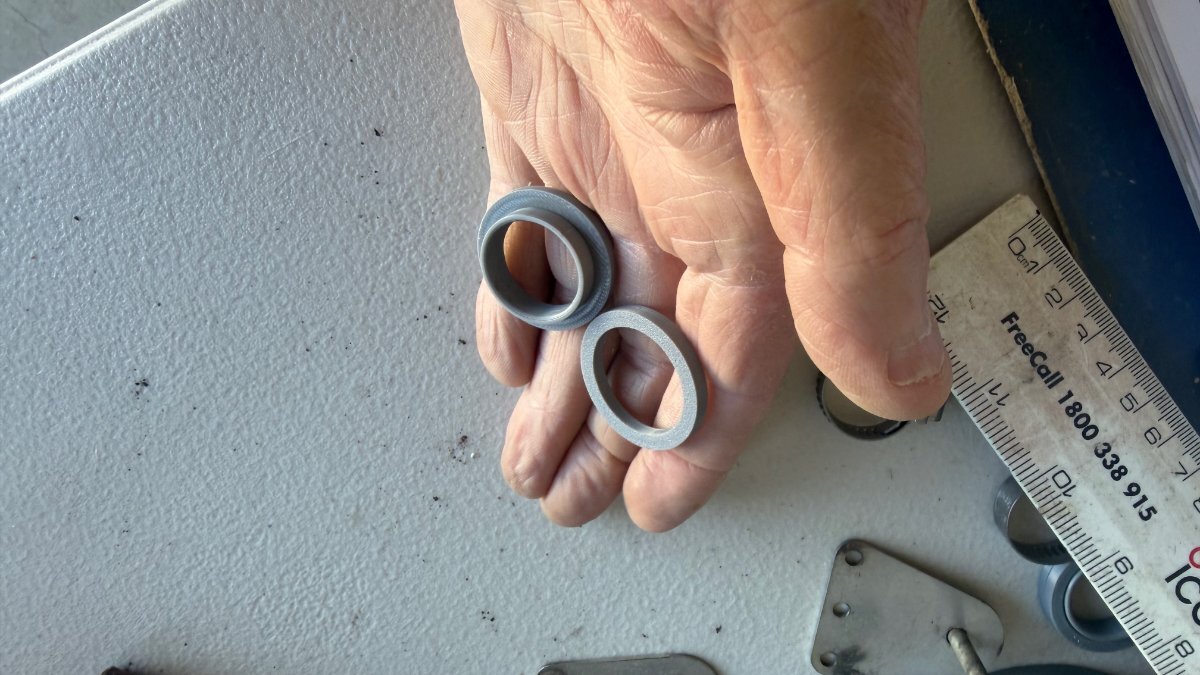
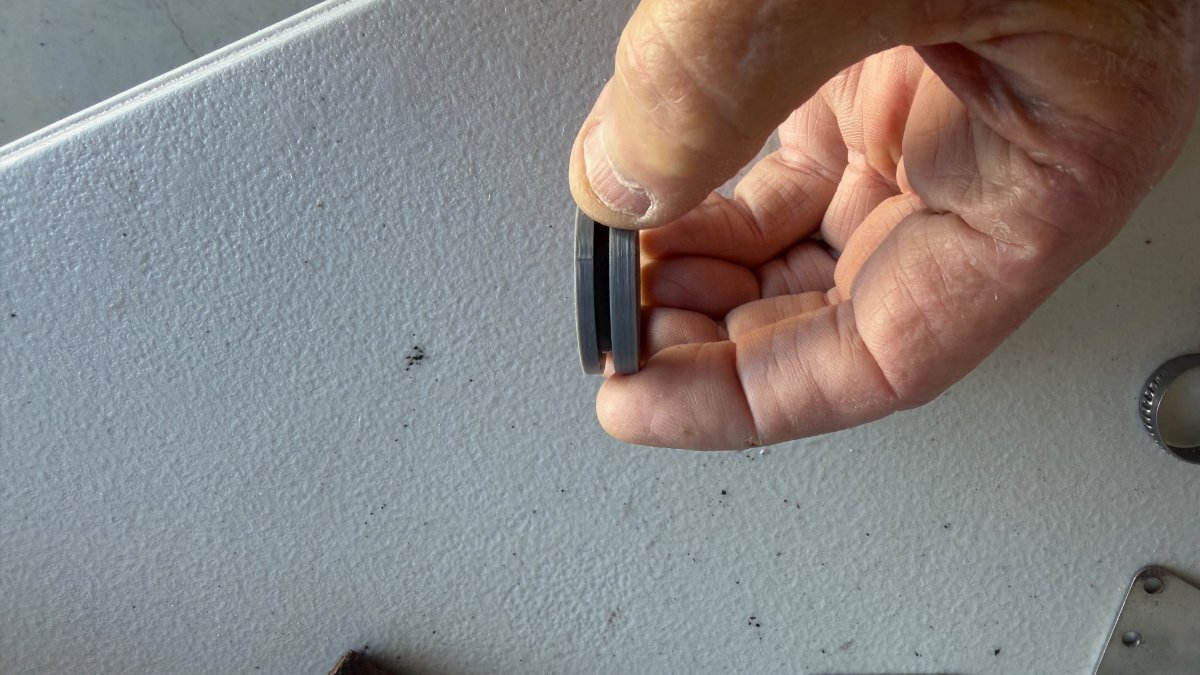
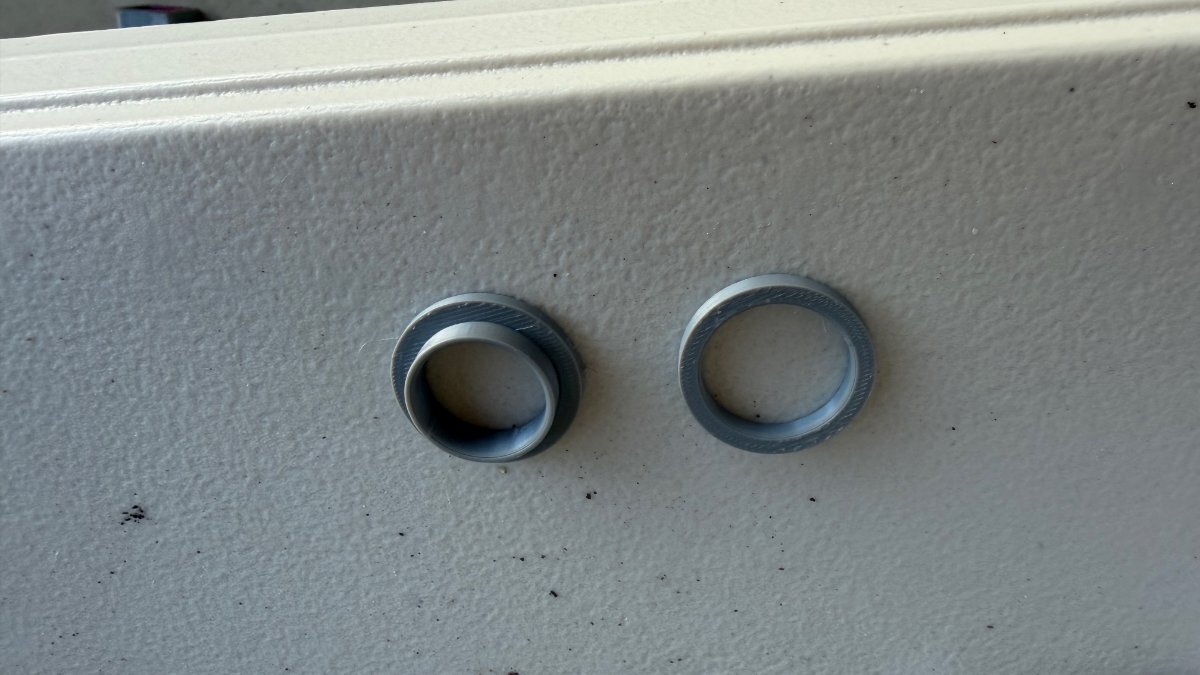
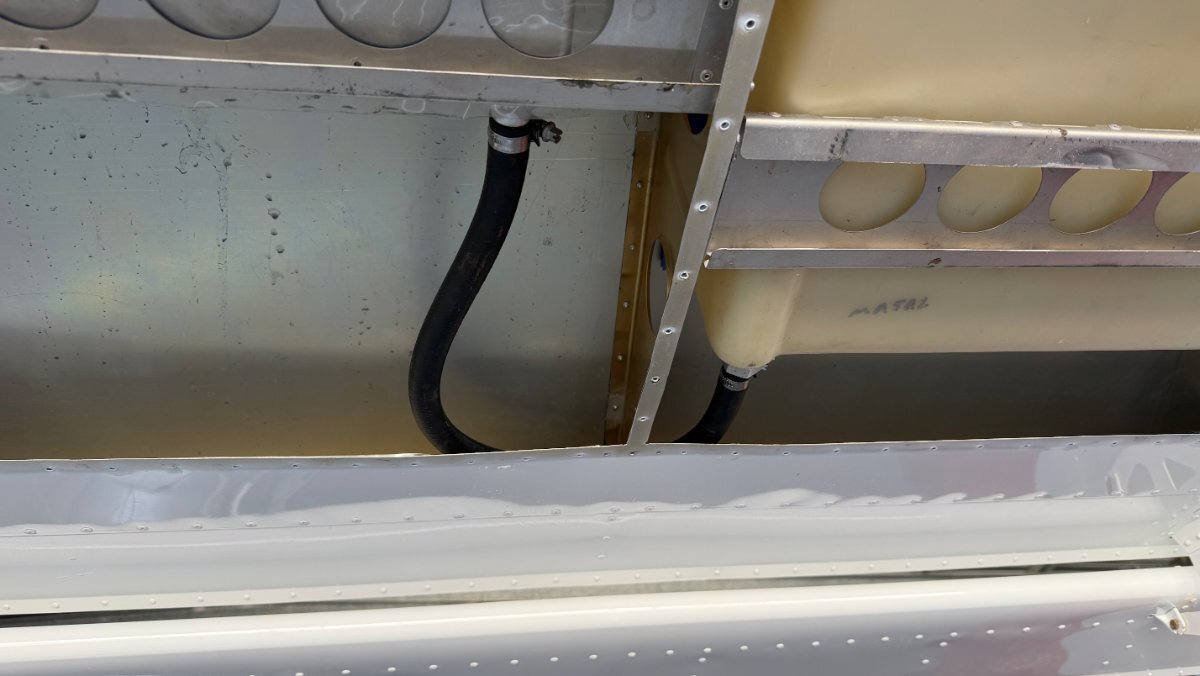
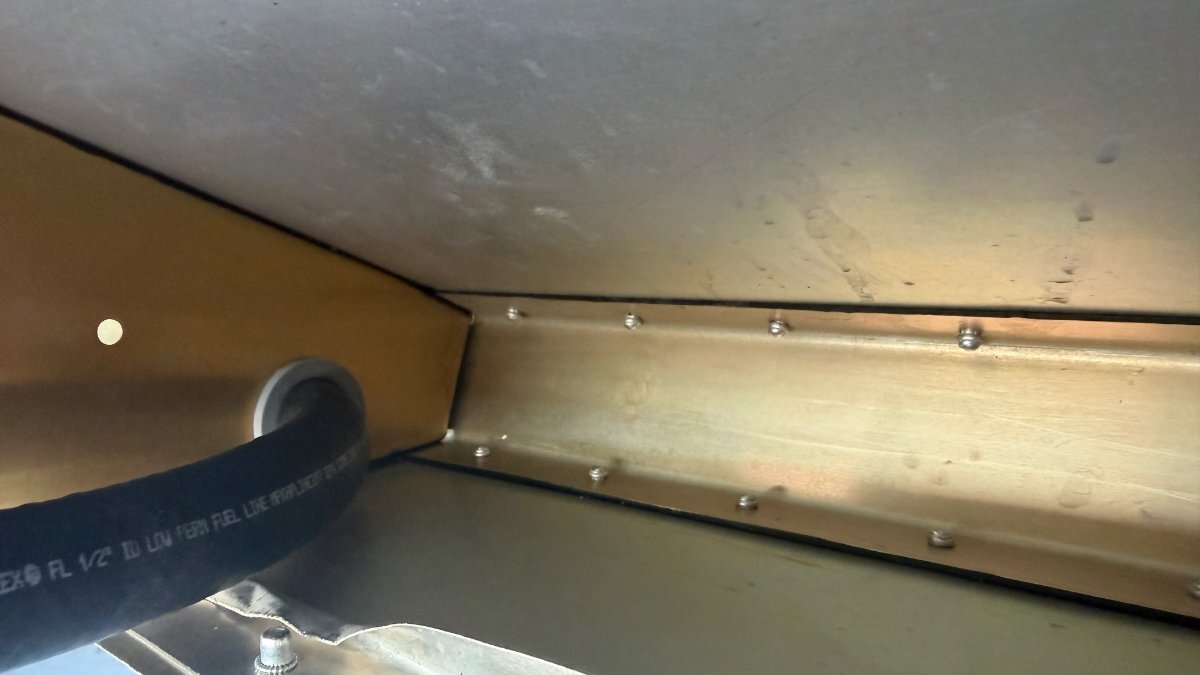
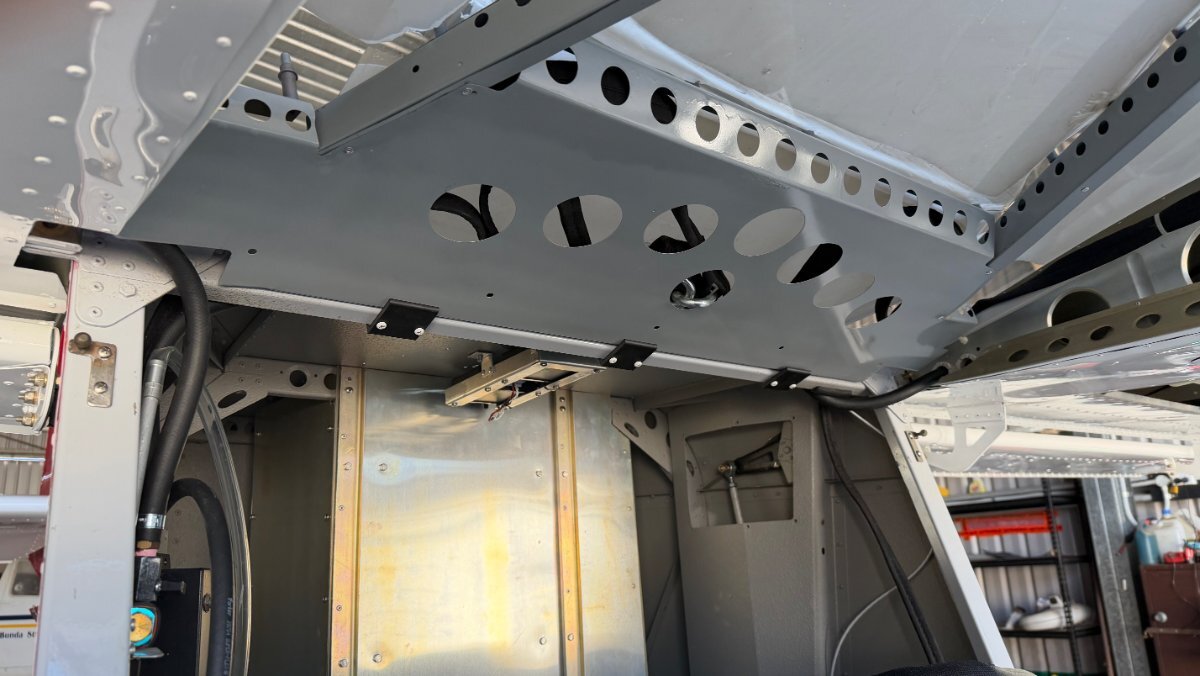
Been getting a lot more done since getting the wings on. The see through top cabin cover which I have had special IR and sun tint applied to is now back on The flaperons are all now on and connected. The rudder is now fitted The fuel tanks are plumbed together and also now plumbed to the manual fuel switch The larger 1/2 inch transfer pipe that goes between the 2 tanks in each wing would not go through the rib hole at the back so I designed up a new grommet so it would fit nicely and 3D printed those from ASA filament at 100% fill The fuel tube that runs overhead to the manual switch from the left I designed up some support brackets for the fuel tube remain captured behind and above the cabin head support. These also keep the rear tray for the parachute straps supported, they are 3D printed from CF=Carbon filament and 100% fill Fitted off the brake hoses to the brake units on both sides. Glad to see the calipers still nicely fload over its bolts after such a long time since I re did both calipers Everytime I go to the hangar I put a few hours in. I am doing all those final fit off and finishing jobs that take a lot of time. The 90% done 90% to go rule The dihedral really does make the aircraft look better What is that saying. "To eat a elephant you do it one bite at a time"
-
As a owner builder for a 19 rego aircraft you are now not allowed to submit your own W&B. Now you have to get a Casa WCO (Weight Control Officer) to do it . So the rate seems to be $1200 from chasing this up and thats if you have someone reasonably local to do it. Just another excess cost in my opinion. More red tape regulation again. The system was fine before. I asked the question of the Tech dept at RAA and this is what I got back Hi Mark, Thank you for your enquiry, and I hope your build is going well. Section 10.1 outlines the requirements for aircraft weight and balance, and states that CASA CAO 100.7 is applicable. I would recommend reading the complete CAO for weight and balance, however Section 4 of the CAO outlines weight procedure and who can do the report. (Reports do need to be conducted by a CASA Weight Control Officer or verified weight control authority). Link to CAO 100.7 - https://www.legislation.gov.au/F2015L01127/latest/text 4 Weighing procedure 4.1 Aircraft weighings must be carried out under the control of a weight control officer whose appointment covers the activity, or a person referred to in paragraph 4.1A. Note Subject to compliance with paragraphs 4.1 and 4.7, a person, other than a weight control officer, may carry out the weighing of an aircraft. 4.1A A person may carry out the weighing of aircraft and prepare a weighing summary for aircraft (other than power-assisted sailplanes, powered sailplanes or sailplanes) that are to be certified under regulation 21.190 and 21.195A of CASR for a purpose mentioned in paragraph 21.191 (g), (h) or (j) of CASR if the person: (a) has successfully completed an aircraft weighing procedures course approved by CASA within the last 2 years; and (b) has had practical experience in setting the aircraft up in the levelled or flying position for the purpose of conducting symmetry checks, rigging angles and control surface travels, if applicable; and (c) weighs the aircraft on scales that are approved by CASA or an organisation that has been approved by CASA for the purpose of this subparagraph; and (d) ensures flight tests are conducted in accordance with paragraphs 91.875 (2) (f) to (j) of CASR with the aircraft at maximum and minimum permitted take-off weights and loaded so that it is tested at forward and aft CG limits; and (e) complies with any other condition that CASA deems necessary. 4.2 Aircraft must be weighed on scales that: (a) have an accuracy over the temperature range for which the scales are designed of: (i) ±0.2% of the applied load; or (ii) ±2 kg; whichever is the greater; and (b) are of a type suitable for the purpose. 4.3 A scale mentioned in paragraph 4.2 may be used to weigh an aircraft only if it was calibrated, within the 12 month period ending on the date the scale is used to weigh the aircraft, by: (a) the manufacturer of the scales; or (b) an organisation that is approved by the National Measurement Institute for a purpose that covers the purpose of calibrating the scales; or (c) an organisation using a reference standard in respect of which there is: (i) a valid certificate of calibration (however described) issued by an accredited organisation; or (ii) a valid certificate of verification issued under regulation 13 of the National Measurement Regulations 1999. 4.3A For subparagraph 4.3 (c): (a) a certificate of calibration or verification for a reference standard is valid: (i) during any period of effect stated on the certificate; or (ii) until any date stated on the certificate by which the reference standard must be recalibrated or reverified; (b) accredited organisation, in relation to a certificate of calibration for a reference standard, means an organisation holding an accreditation to calibrate the reference standard issued by: (i) the National Association of Testing Authorities Australia; or (ii) an entity that is a full member of the International Laboratory Accreditation Cooperation. 4.4 Sufficient personnel and equipment, including scales, must be provided to satisfactorily carry out the weighing. 4.5 The empty weight and empty weight CG must be determined from the results of 2 consecutive and independent weighings. The load must be completely removed from the scales between each weighing. 4.6 If the difference between the first 2 weighings exceeds 0.2% of the mean weight or 10 kg, whichever is the greater, further weighings must be performed until the results of 2 consecutive and independent weighings agree within that tolerance. 4.7 The empty weight and empty weight CG must be certified as correct by a weight control officer whose appointment covers the activity, or a person referred to in paragraph 4.1A. Weighing details and the determination of the empty weight and empty weight CG must be entered in an aircraft weighing summary approved by CASA. 4.8 A list of equipment included in the empty weight must be prepared for each aeroplane and rotorcraft.
-
My Savannah S model rebuild Blog
Kyle Communications replied to Kyle Communications's topic in Savannah
I contacted Reg Brost today and we had a long catchup chat...it was great to have a chat with him again. He doesnt remember either but he only ever got the strut from ICP but he did remember ordering too much at some stage. We think I must have picked it up from him when he was up here in Brisbane..he came up regulary. So I would have met him over the southside and I would have brought them home in my big Iveco van. I can fit 4m lengths inside it. Old age is a bugger not only the body gets slow and tired but so does the memory I would hate to think how much it would cost now as that would have been back in 2017 I think. BTW was speaking to the importer here ordering some VG's and pricing on other parts. The price of a std Sav kit now with analogue guages is about 75k. !!!! My original Sav kit cost me 27k back in 2011 -
My Savannah S model rebuild Blog
Kyle Communications replied to Kyle Communications's topic in Savannah
I cant rememebr exactly but when Reg Brost had Aerokits he told me where to get it from...it may have even been Capral alu. It was a long time ago just after I recued Mabel from central NSW. I am sure I sourced it here. It is the same stuff that ICP use so I gather its a generic type I know why the sav also has no dihedral too. You can get a std front and rear strut out of 1 4mtr length of it. Once you go 20mm longer on both struts then you just run out of material. This is with the dihedral now. It ended up raising the underside of the wing around 80mm each side from std It certainly looks better Will take some better pics later this week. I got the new struts on yesterday. Only shows 1 strut on but both are done now The rear strut wing side attachment I got my mate to weld up the drilled holes as they were not in the centre as this aircraft was originally so badly built. You fit the rounded ends to the UC bracket and the rear one you attach it then mark and drill the holes. Now my struts actually do have the bolt holes in the strut in the centre these now are fitted correctly
-
My Savannah S model rebuild Blog
Kyle Communications replied to Kyle Communications's topic in Savannah
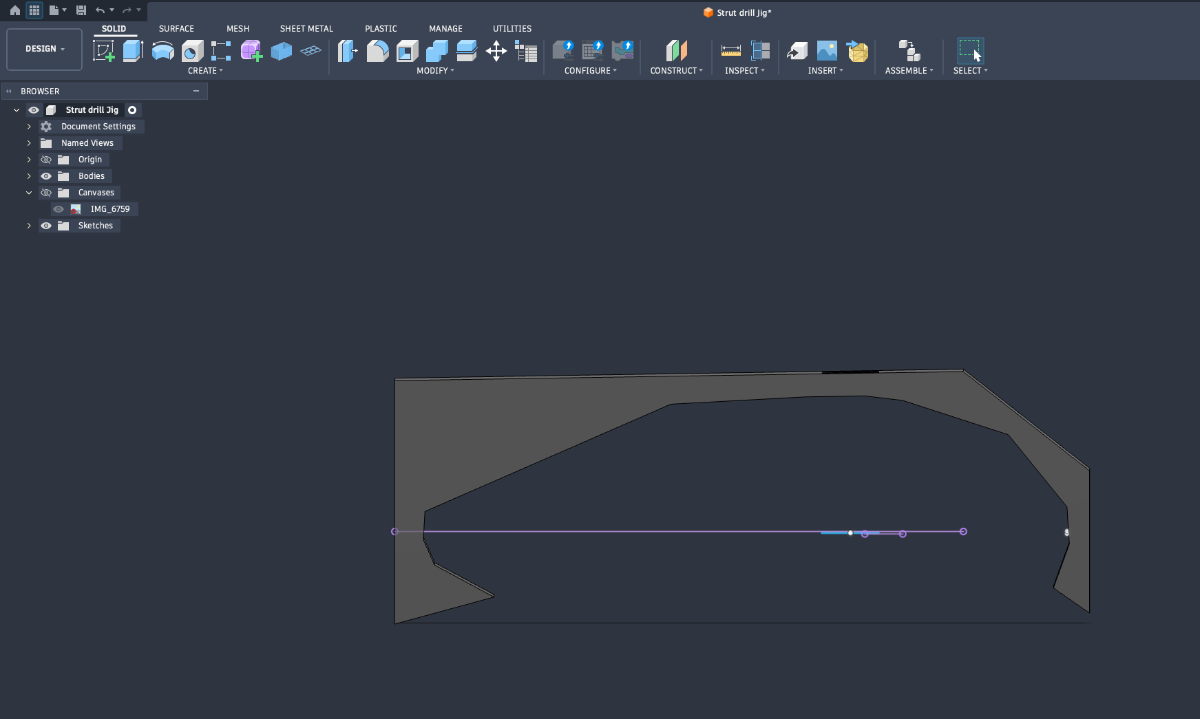
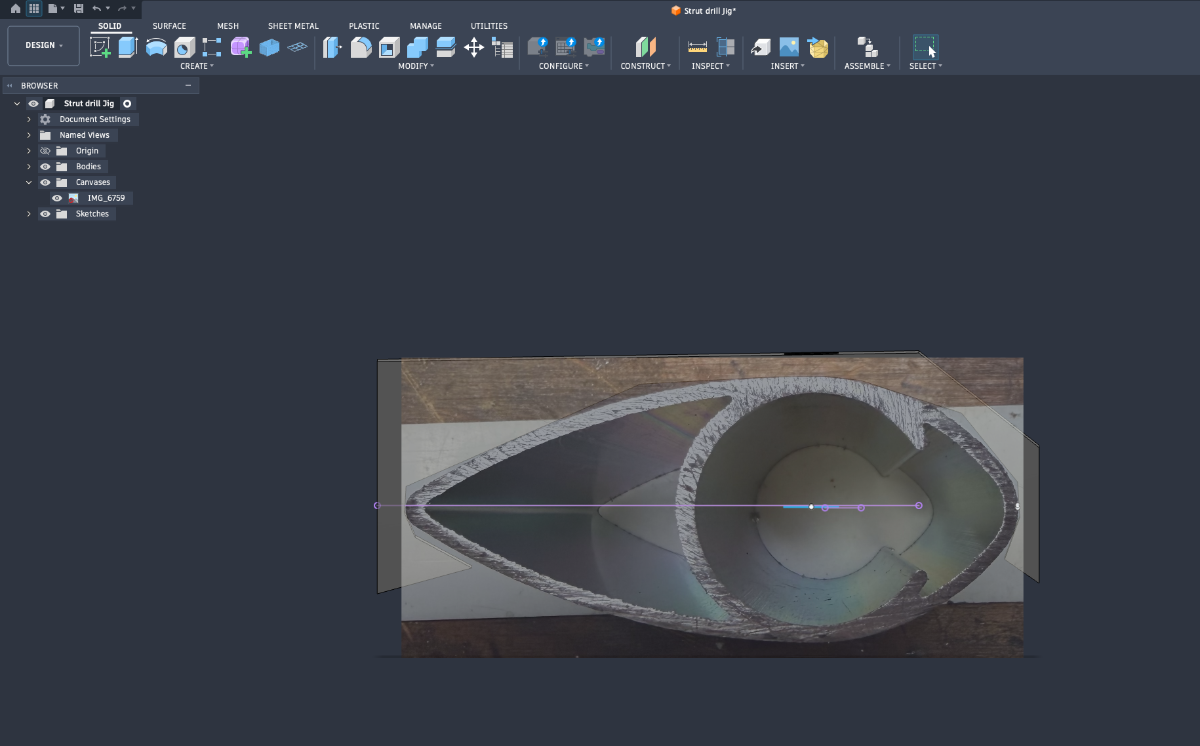
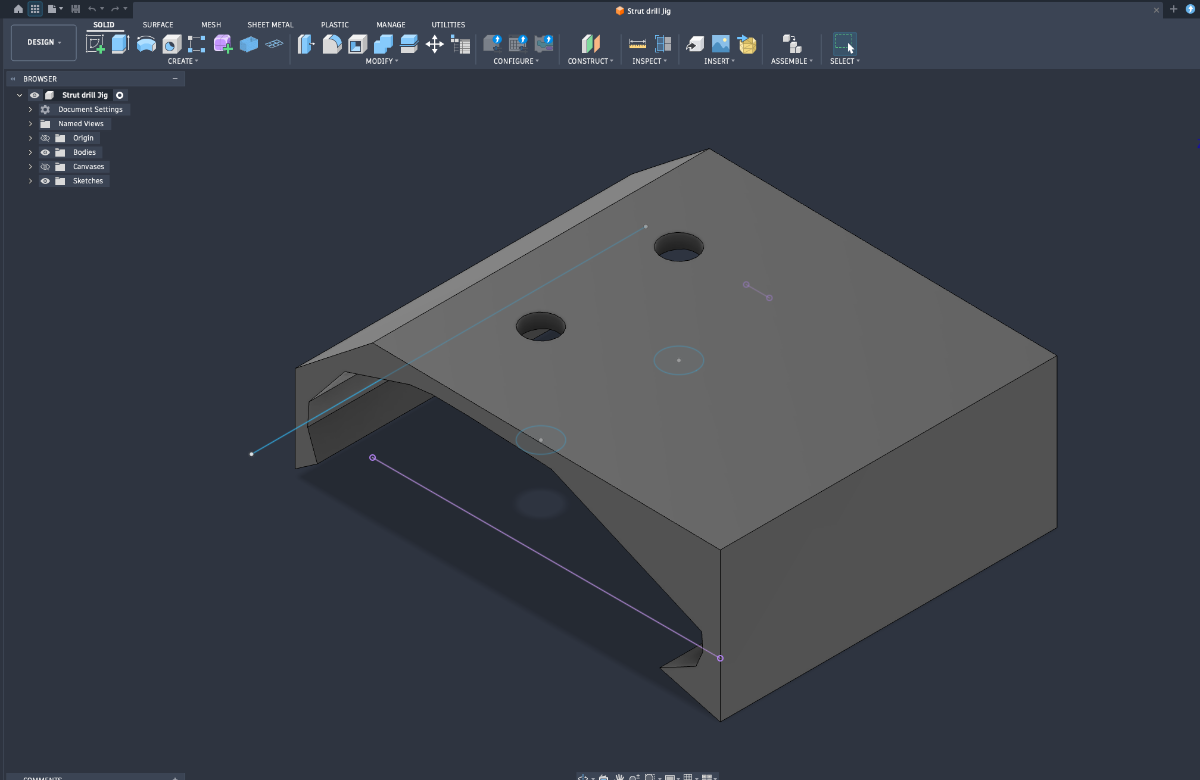
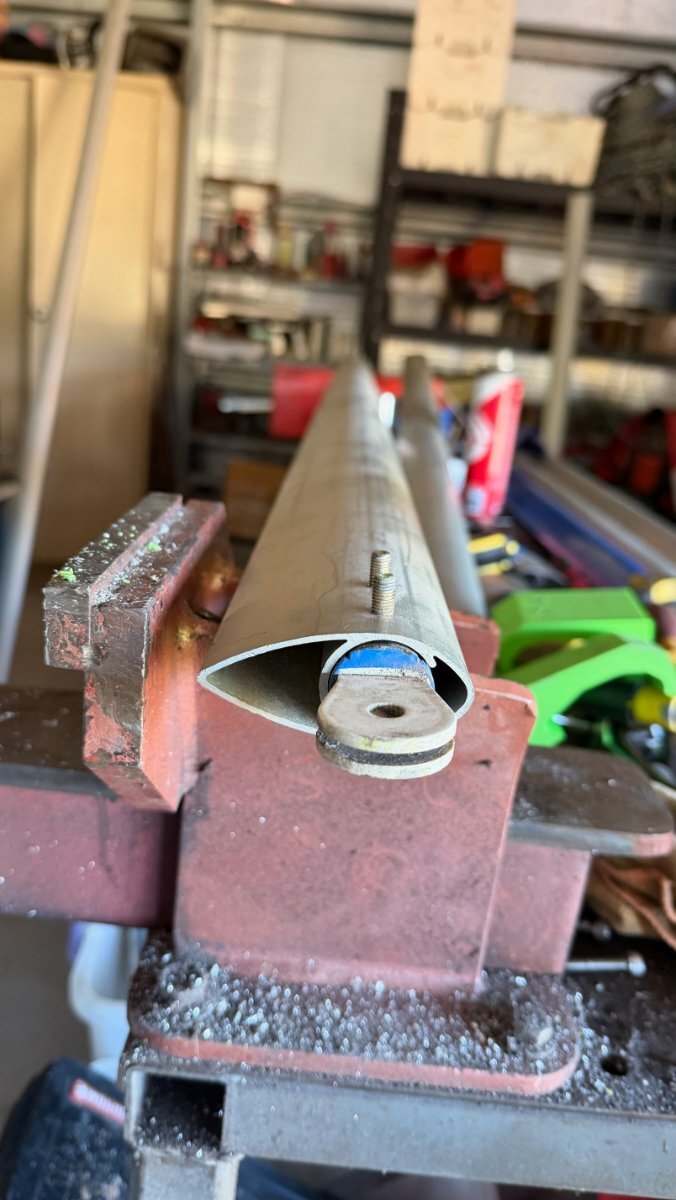
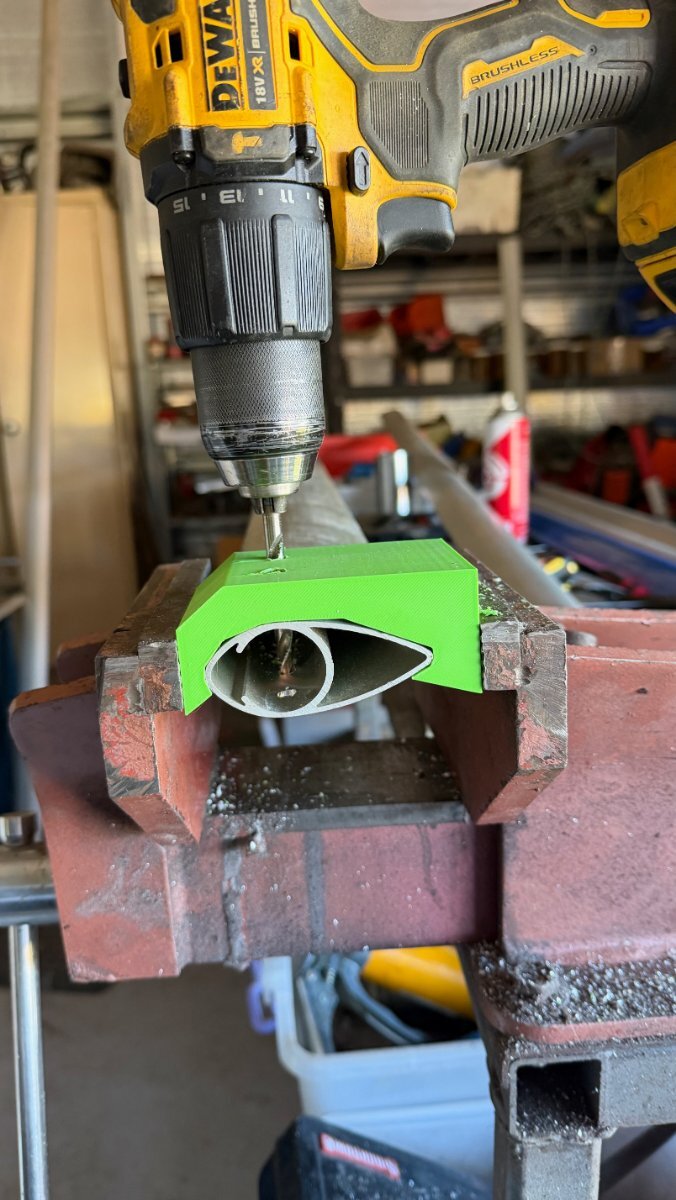
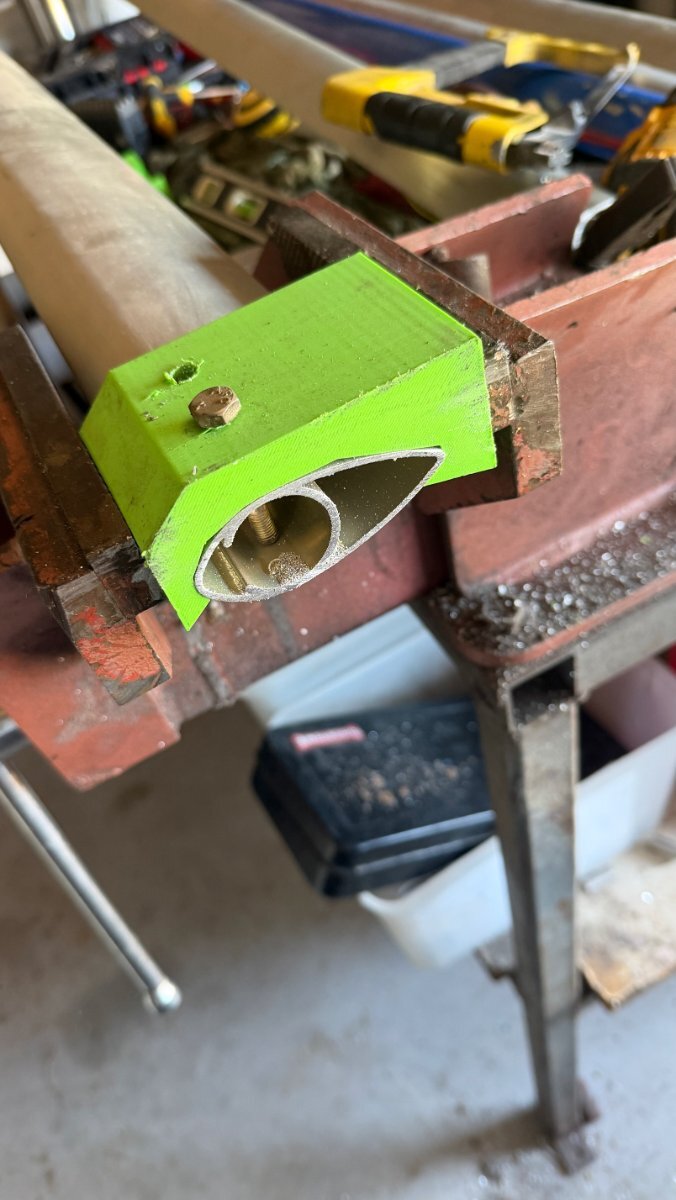
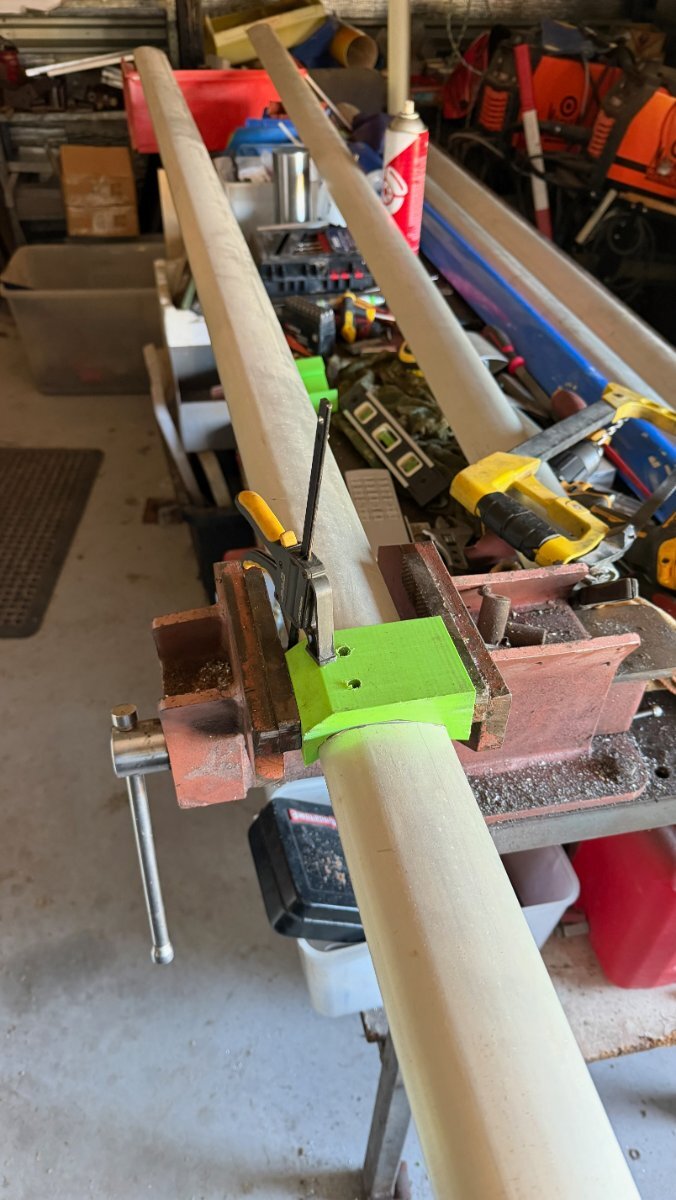
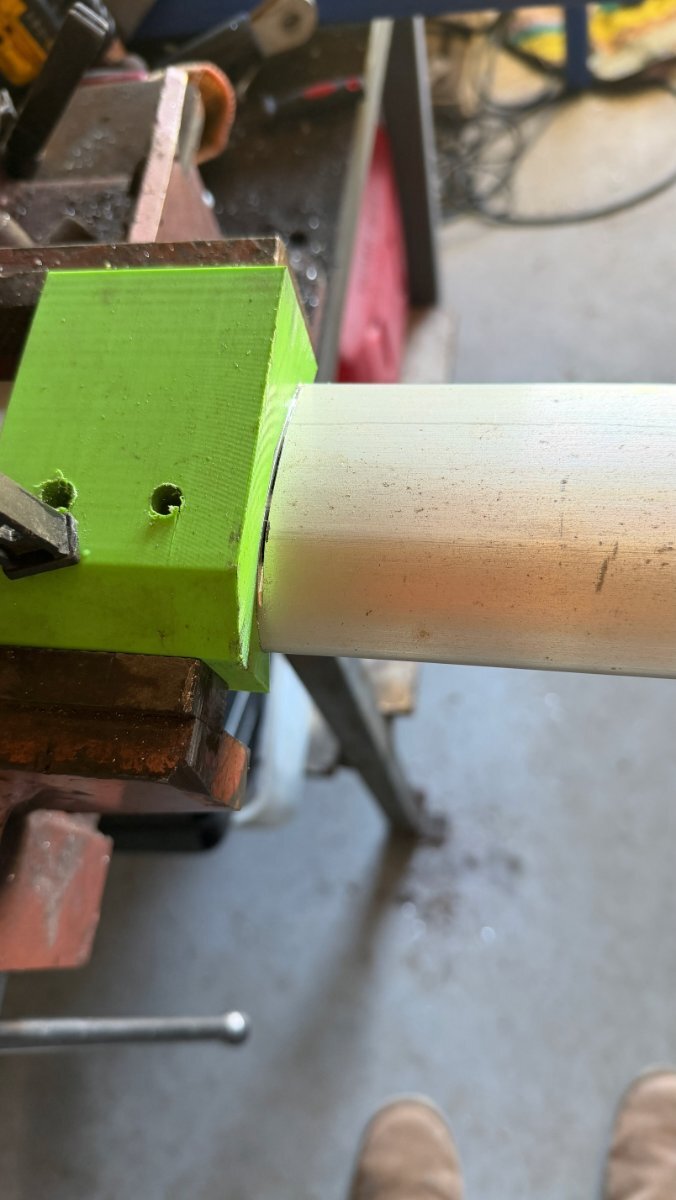
I have 2 of the original struts currently holding the wings up at their std angle. The dihedral I need for 1.5 deg is to make those main struts 20mm longer which will lift the tips up around 110mm from original. To cut the new strut alu I designed up a profile using Fusion 360 using the canvas option where you take a picture of the profile as straight on as possible. You can import that into Fusion then scale it to the perfect size. This also has the mounting holes in the jig to allow for the correct drilling position in the middle of the strut tube. The jig is reversable so you just turn over the strut align the jig to the end of the tube and drill the holes on the other side. The drill then will go through perfectly through both sides and it is centred. The jig also is made so you can hold it in a vice perfectly aligned straight and level and both sides of the jig allow cutting the tube squarely as you have a side to saw against. Very happy with the way it came out and the ease of how it all went with the jig. Spent a bit of time getting the jig designed and dimensionally perfect but it was worth while. I have the stl file if anyone wants it. For those who are interested the main alu strut length was 2028mm it is now 2048mm long. The same jig is used for the rear strut it will also be 20mm longer than standard but the attachement at the fuselage end is fine and I can use the jig but the wing attachment end is a slight issue as that internal fitting was drilled when the kit was built and this aircraft was built so badly when it was built...see the beginnings of the thread about the original build quality. That I will either have to weld up the holes or try to drill the strut to suit the attachment which are not square. The issue is the outer wing attachment is not at 90deg to the strut like the inners and the main strut outer attachment. The outer rear attachmant is angled so this is drilled when you have attached the wing through the strut alu and of course it was poorly done originally. I would like to get 2 new out rear strut ends but I doubt very much the dealer here would have them. I will ask but dont hold out much hope.
-
My Savannah S model rebuild Blog
Kyle Communications replied to Kyle Communications's topic in Savannah
Yes it does help the fuel drain much better and that is a issue with a savannah especially when flying. My new tank setup in Mabel is a bit different to std as well and dihedral will make sure I get better fuel flow from the tanks It does also help flatten out the bumps also it does make turns a bit softer. Tom Cadet who designed the Borabee, he is in Casino has modified his savannah with some dihedral and noted the better flying characteristics that it makes. Tom has designed and flown many aircraft. The beauty is with this is if I dont think its any better I just put back the original strut lengths. The way the wingas attach make this very easy to do. -
My Savannah S model rebuild Blog
Kyle Communications replied to Kyle Communications's topic in Savannah
Major milestone today. Mabel has wings. Now she is starting to look like a proper aircraft. Had 3 of the guys give me a hand this morning and we fitted the wings. I was pretty happy with the fit. The RH wing I needed to shave about 1 mm off some of the trailing edge spar stock to get it to fit the rear bolt up against the bracket. The LH wing was a just perfect fit..no room though but it fitted fine. I have the original main wing struts just holding the wings at the moment as I have all new strut material to make up some slightly longer ones that will give me about 1.5 deg dihedral. Dihedral makes the sav fly a lot better in the bumps it also looks better too Now she is back in a hangar I can work regularly on her. Hoping to have her in the air by the end of this year
-
My Savannah S model rebuild Blog
Kyle Communications replied to Kyle Communications's topic in Savannah
The std savannah seats are pretty thin. The back needs to be thin due to the way the seat back panel is and I am pretty tall so dont want to be pushed any further forward. I have used the originals as you can see in the previous post but the std seat base for this model which was a 2011 one the bases are curved and the thin seat went into it and after an hour or so you got a sore bum. You will see I totally changed the seat base and mounting to be a little like the sliding seat base on the later models but I changed it as well. The base is very flat and I planned to put a thick foam base into it. I made up the seat cushion from varying grades of foam as advised by a upholsterer who is in our areoclub. Fiona is also one of the ARO for our airfield. She also looks a=fter our Mogas bowser..she does enormous work for our club. Once I got the size and shape I wanted she upholstered th base inserts and they turned out great. The std sav seats then velcro to the base. The seats are way more comfortable now and it does not adjust my preferred seating position.Really pleased with how they came out -
My Savannah S model rebuild Blog
Kyle Communications replied to Kyle Communications's topic in Savannah
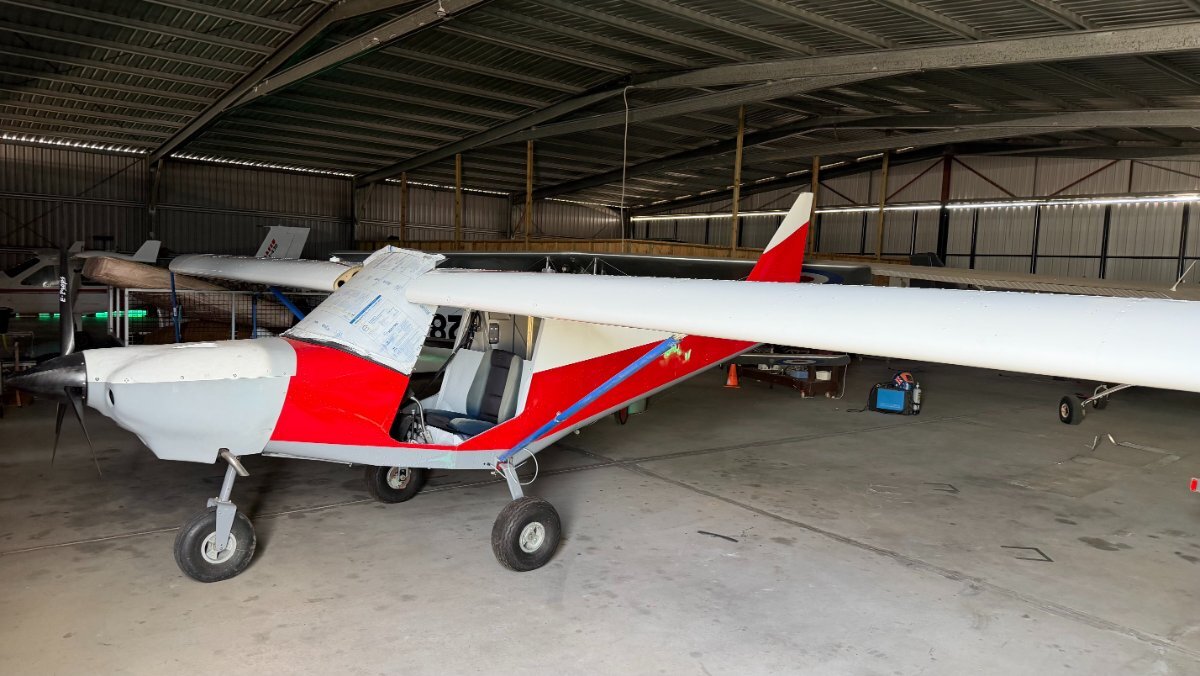
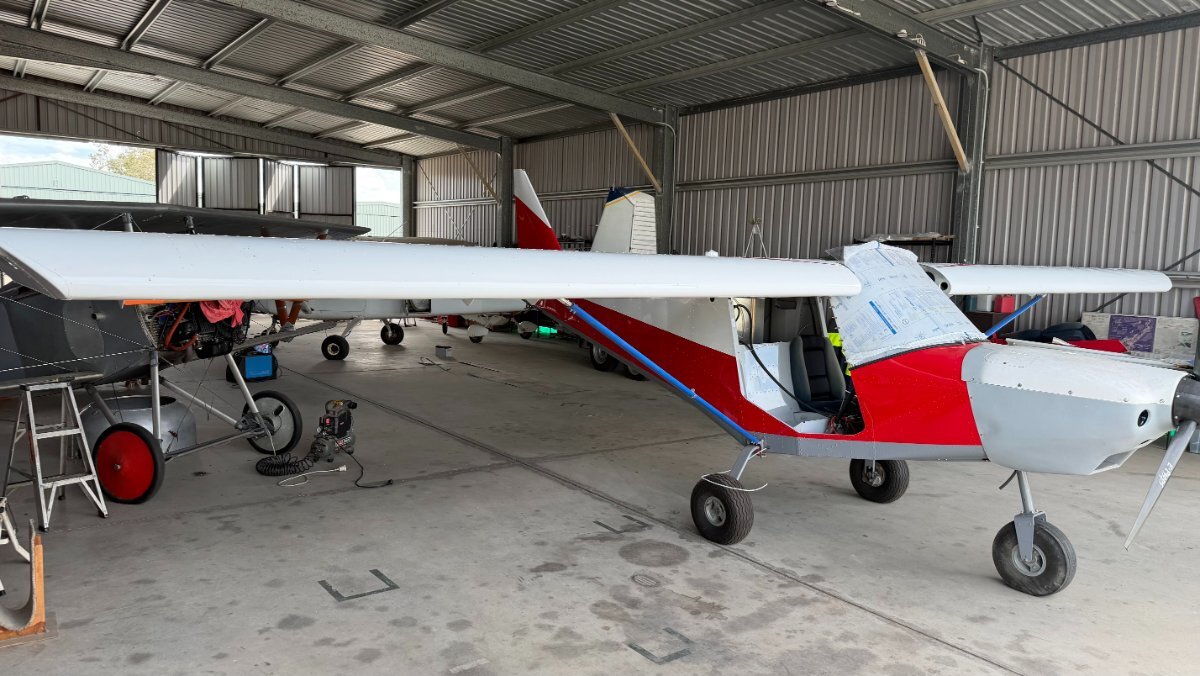
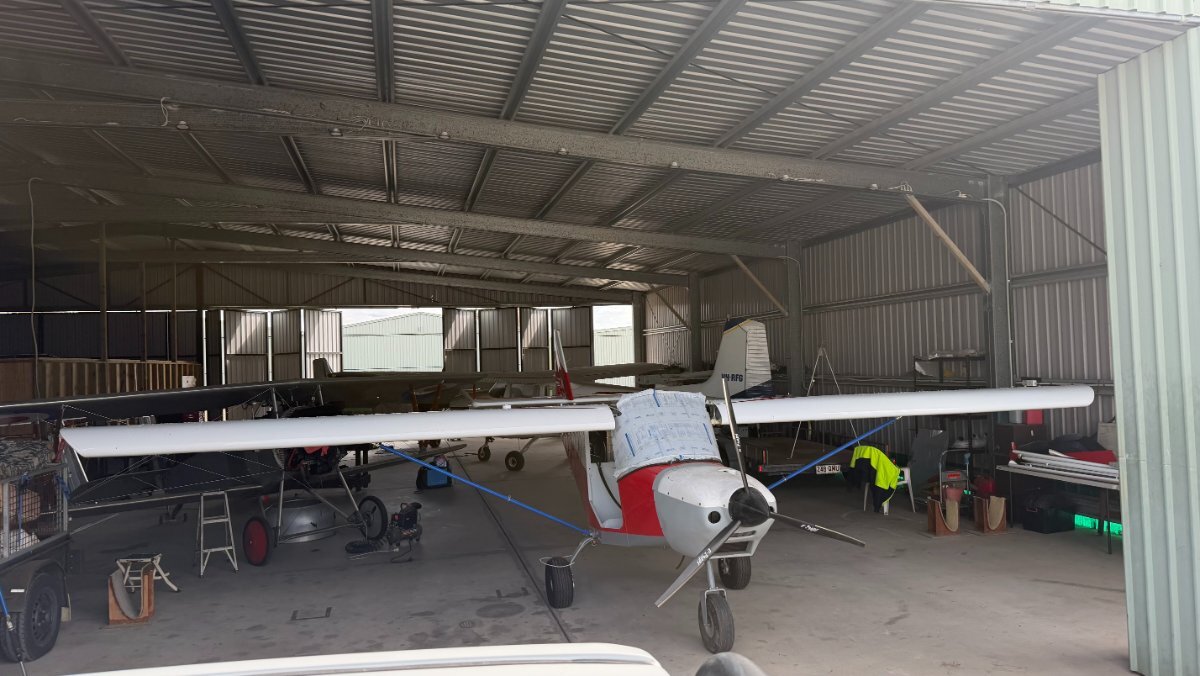
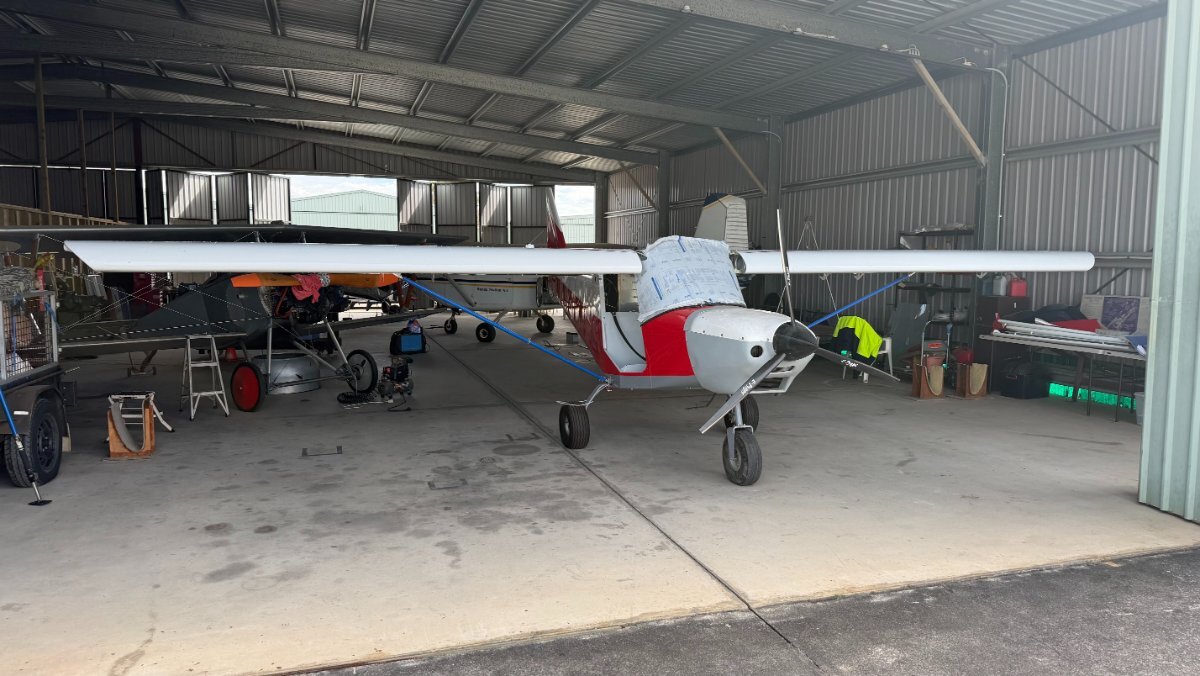
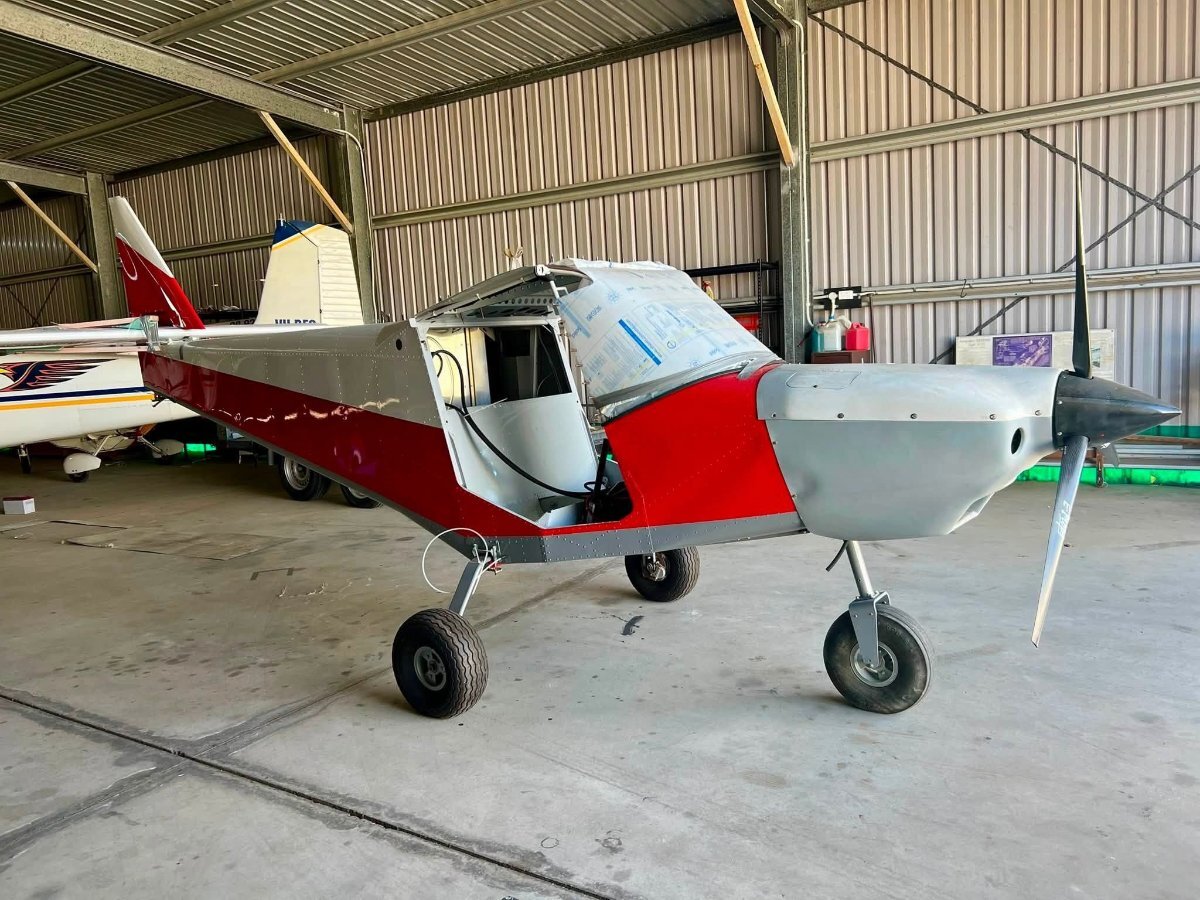
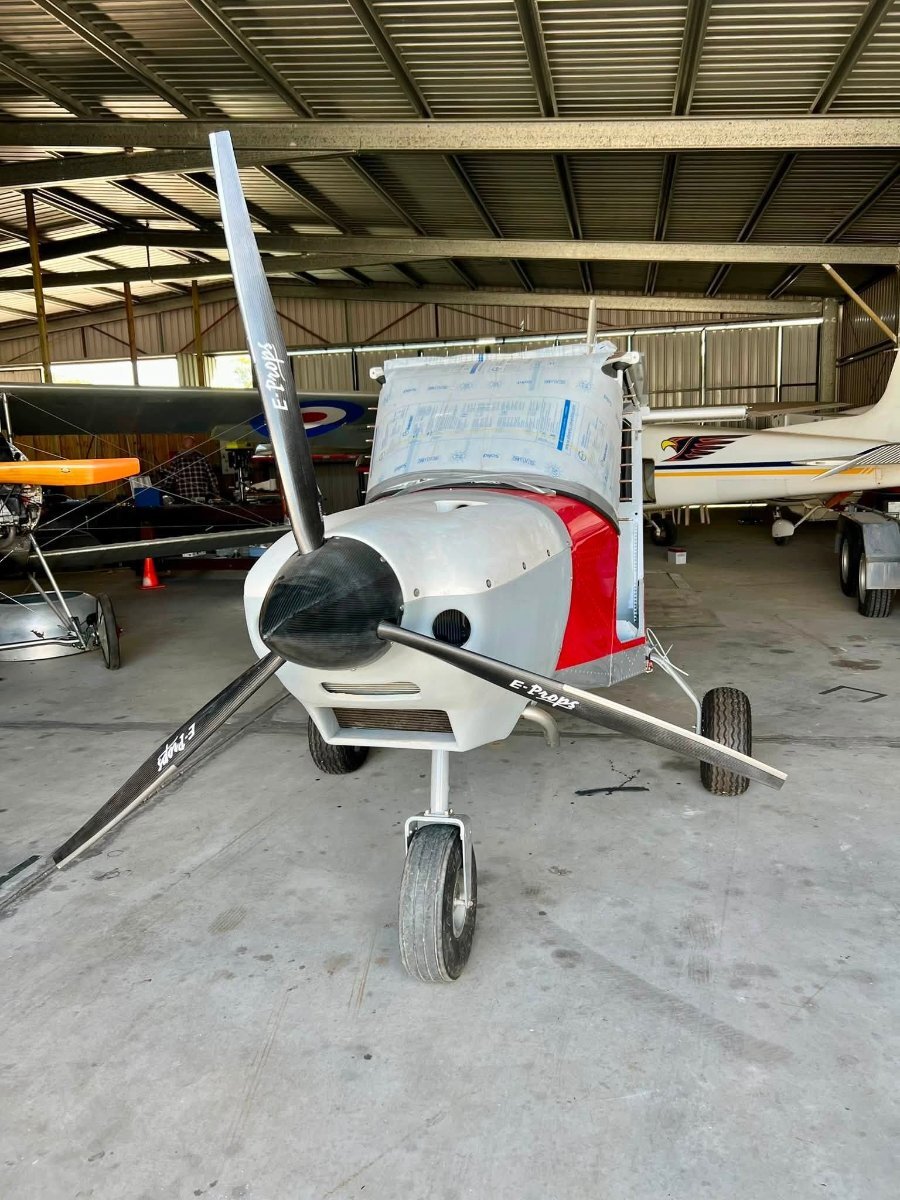
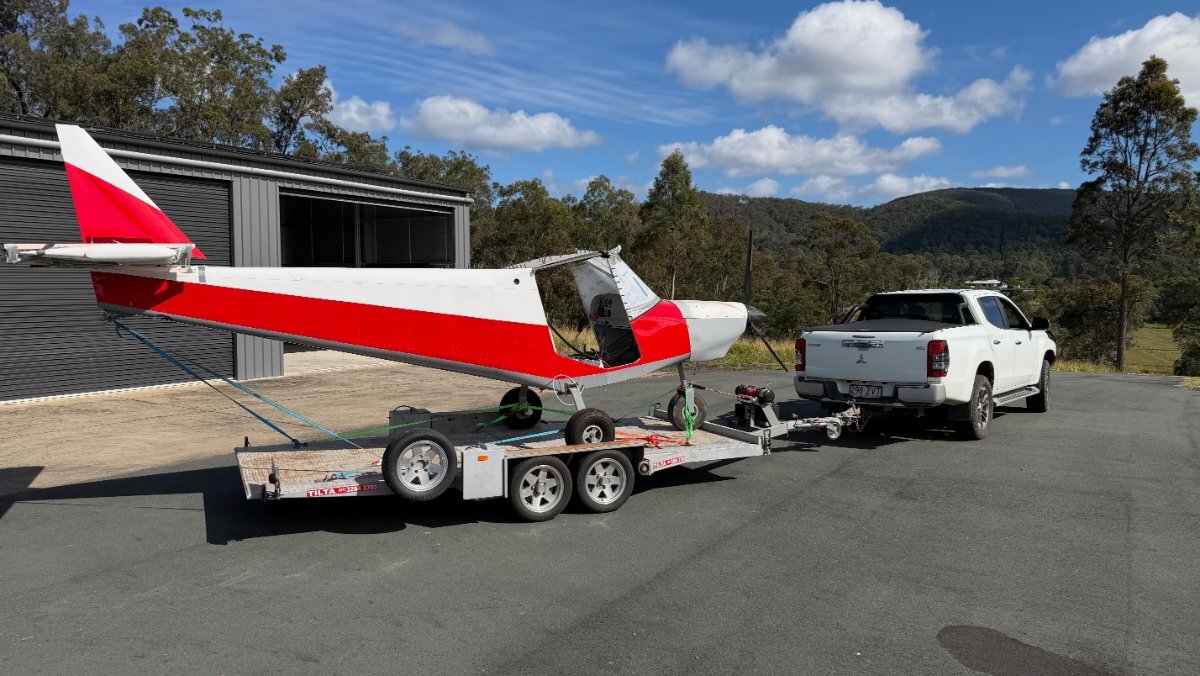
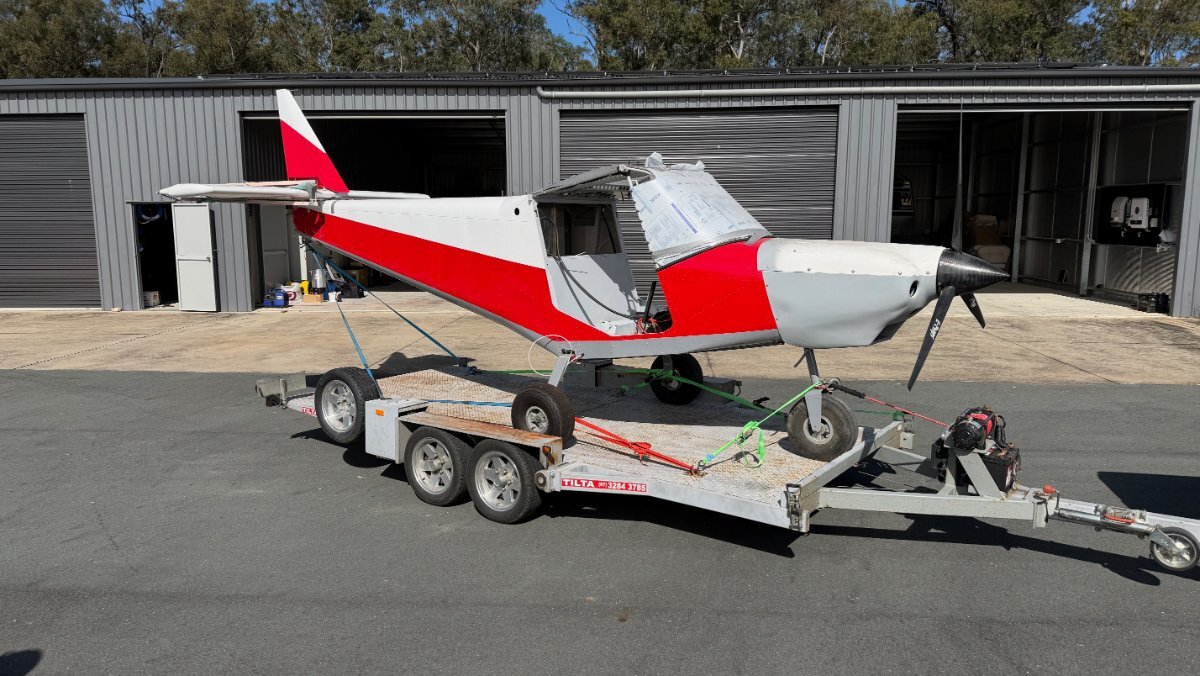
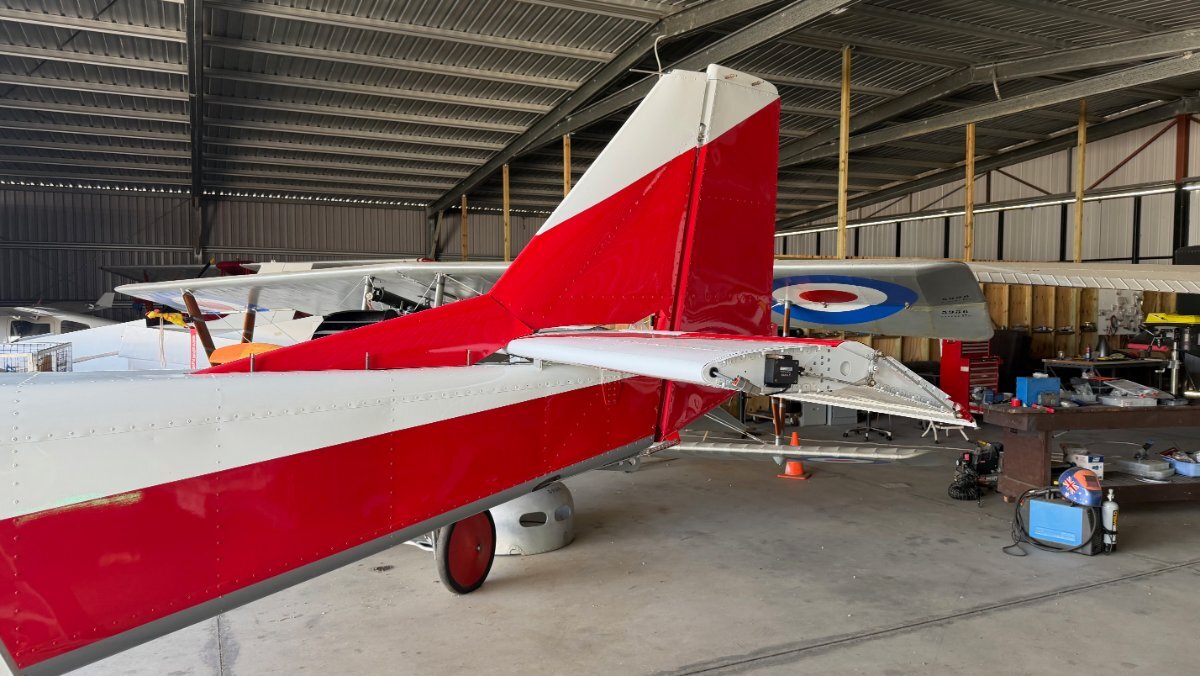
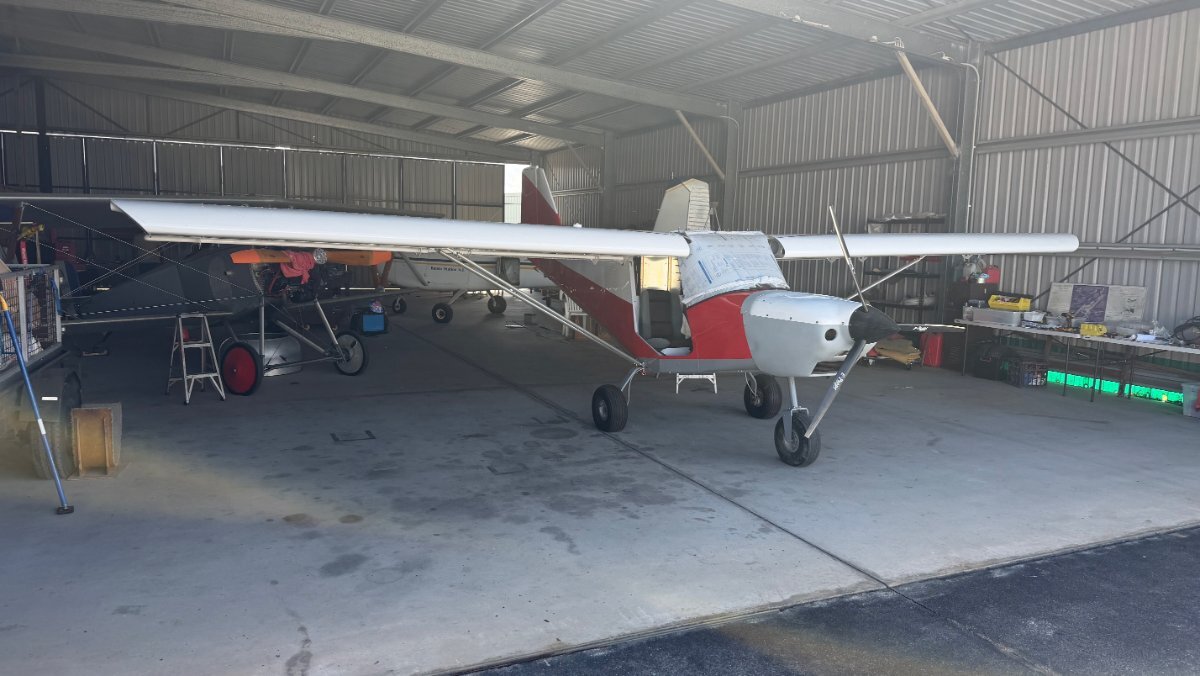
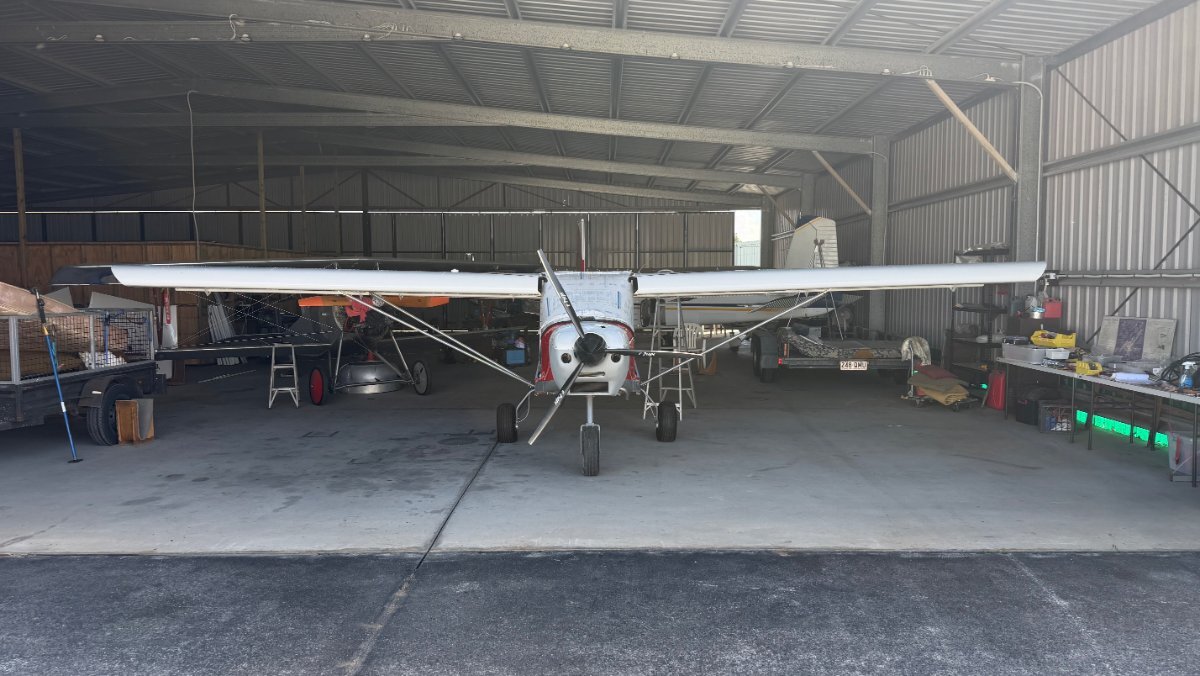
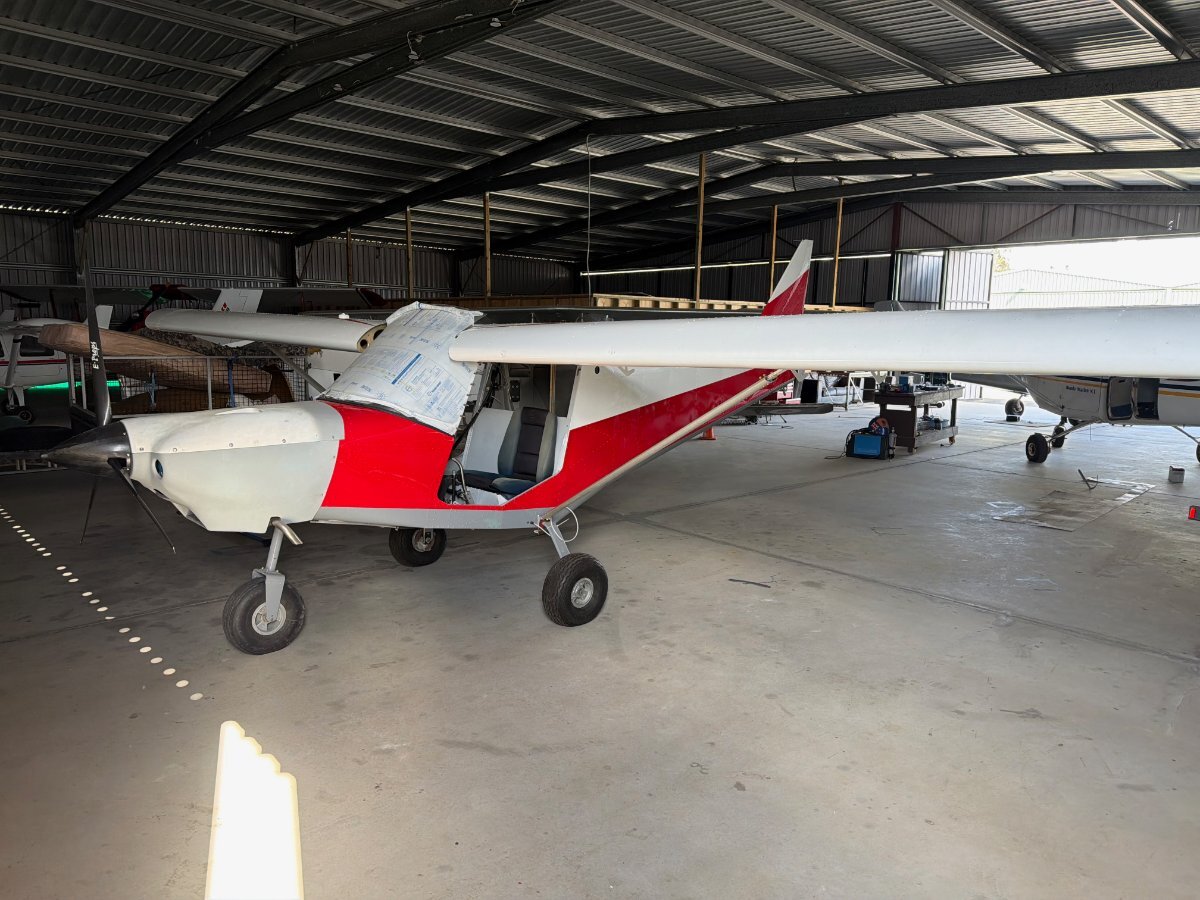
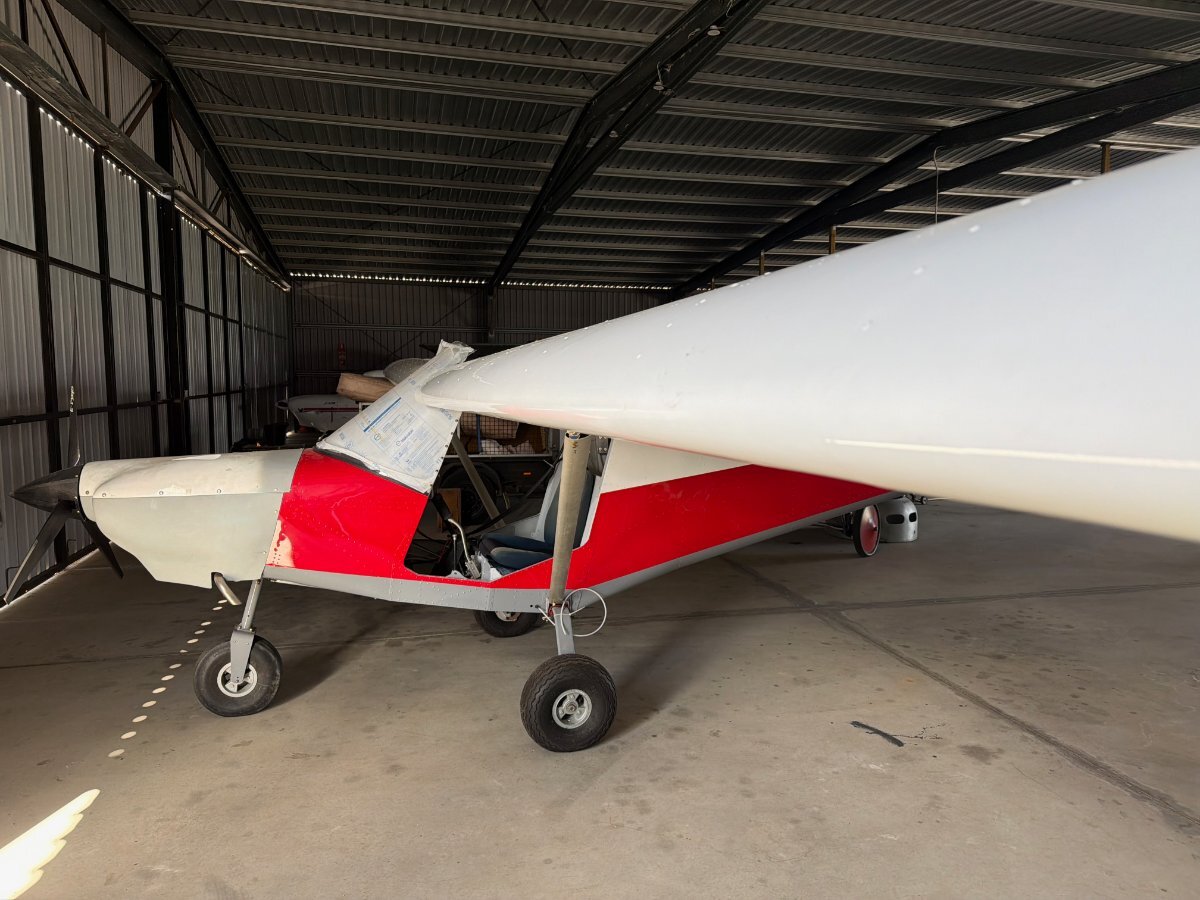
This thread is alive again. Its had a long hiatis due to too many things going on in my life. Land subdivisions here and buying a new property. to put a house and hangar on at a Airpark airstrip, demolishing our house here in Burpengary in late october and moving 2 houses into the big shed here while we have been waiting for the house build company to get their finger out and finally this week they have started the new build. So Mabel had to be taken out to a mates place last October to be stored as there was no room here in my big shed or in my hangar which has another aircraft in it that I bought in partnership with a mate. I have been working on going through it to get it ready to fly. So I havent done any work on Mabel since then. Another mate george in the hangar next door to mine has almost finished his new Savannah build but he owns 2 hangars back to back. He was now not needing his Dtreak Shado and decided to pull it apart and he offered me the section in his hangar so I gratefully accepted and I have now moved Mabel from my mates place over to Georges's hangar so now I can get some work done. I have more time now abeit travelling to and from to the farm to get a few things finished around the place so we can sell it as we are getting too old to look after 125 acres now and this is why we decided to get into a airpark Red tape and council incompetance in trying to get this house built is just crazy..We signed the new build contract for the house in Burpengary back in December and its only just starting now. The new site at the airpark we are now fighting with the council with their red tape and money grabbing tactics as well....this is why yoiu cant get anything built in this country. The amount of this red, blue, back and pink rainbow tape is just out of control no wonder we are turning into a thrird world economy I need to stop whinging about it...but it is so frustrating Anyway after my rant ..I have just got back from a week at the farm working and will be working on getting the wings on Mabel. I will be putting some dihedral on this one. The engine has been run and the tail feathers are on..just need to put the rudder on get the wings on and the new struts cut and fitted. A few more things done then get her ready to fly So will post some more as I get it done Some pics of Mabel in the new hangar and the Mrs apparently went to the airfield and got me towing Mabel there. I didnt know she was there..she was spying on my with the Find My app on the Iphone...cant get away with anything anymore. The Mabel song was done by my mate Danny used a AI song maker. It was just a audio file but I grabbed it and put some pics to it. Its a pretty good song. He wrote the words and the AI did the voice and the music. The world is getting crazy now Mabel song.mp4 IMG_1018 (1).mov





.jpeg.bff19a3188c03fc599aa627333905236.jpeg)